
The Documents tab keeps every file for a trip together. You can look at them any time, and share the ones your traveler needs.
Upload A Document
-
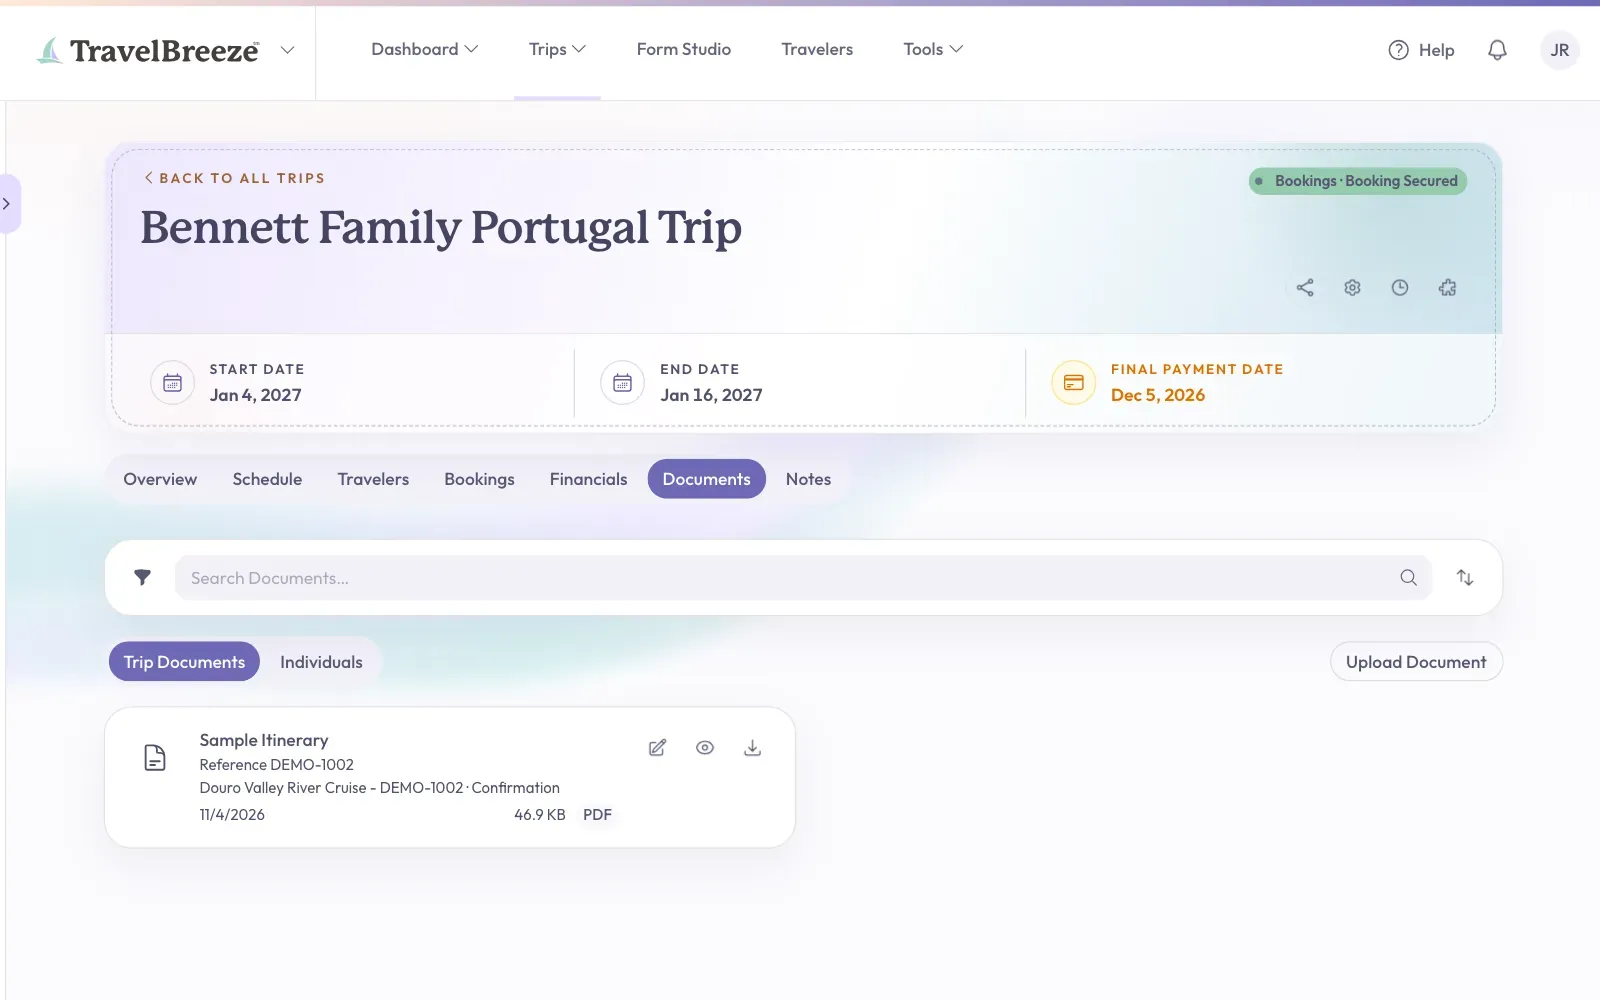
Open the trip. Look at the row of tabs under the trip name and click Documents.
-
Make sure Trip Documents is selected. It is the first of the two small tabs on the left. Look to the right of those tabs and click Upload Document.
-
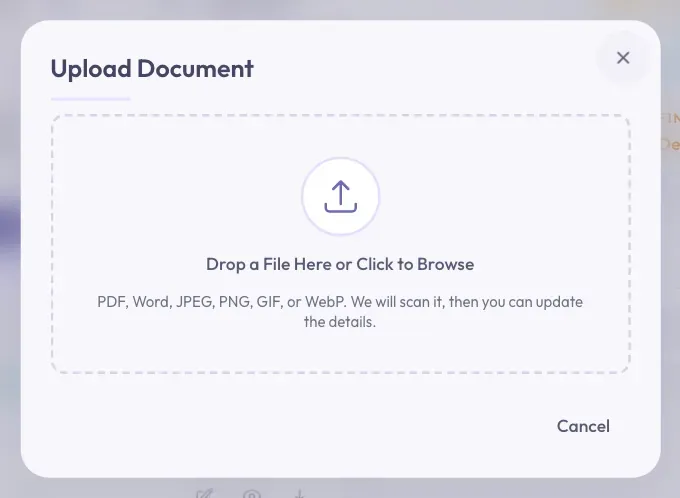
A window opens. Click inside the large dashed box that says Drop a File Here or Click to Browse.
-
Your computer shows your files. Find the file, click it, then click Open. You can use PDF, Word, JPEG, PNG, GIF, or WebP files.
-
Wait a moment while TravelBreeze™ uploads and reads the file. Please do not close the window.
-
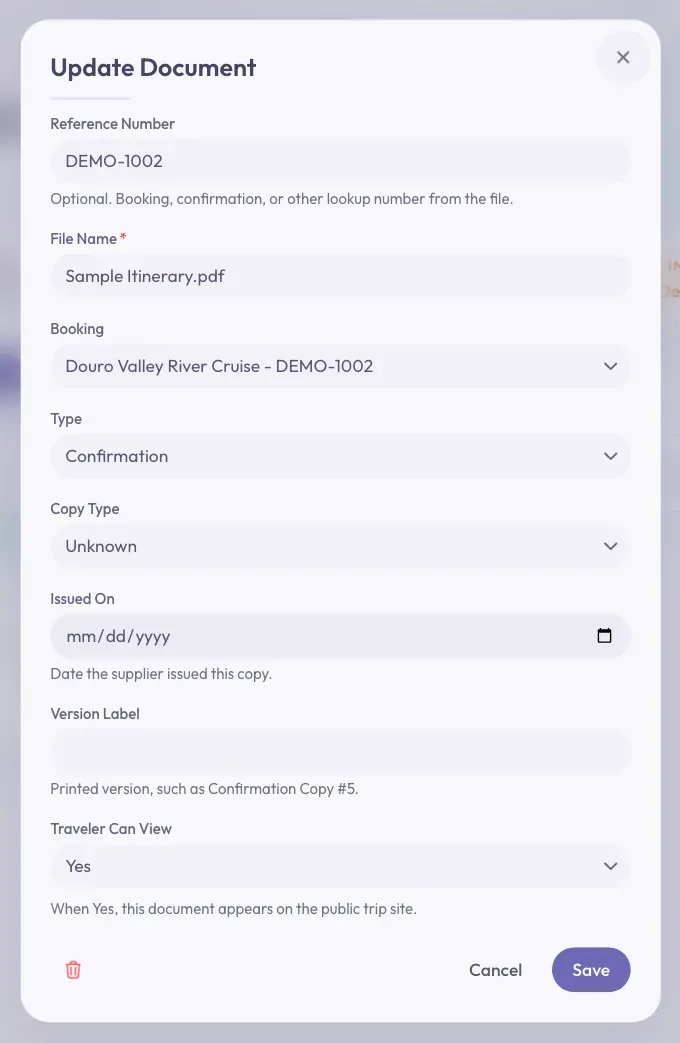
A form called Update Document opens. TravelBreeze™ fills in what it can. Check that it looks right.
-
Choose Yes or No under Traveler Can View. It starts on No.
-
Click Save at the bottom right of the window.
Your file now shows on the Trip Documents tab.
Good to know: Your file is saved as soon as the form opens. Clicking Cancel closes the form but keeps the file. To get rid of it, follow the steps below.
Careful: Choosing Yes under Traveler Can View puts the file on the page you share with your traveler. Leave it on No if it shows your commission.
What The Boxes Mean
- Reference Number: a number that helps you find the file later. This one is optional.
- File Name: the name you will see in your list. The Use Original File Name switch keeps the name from your computer.
- Booking: the booking this file belongs to, if any.
- Type: the kind of document.
- Traveler Can View: whether your traveler can see it.
Look At, Download, Or Change A Document
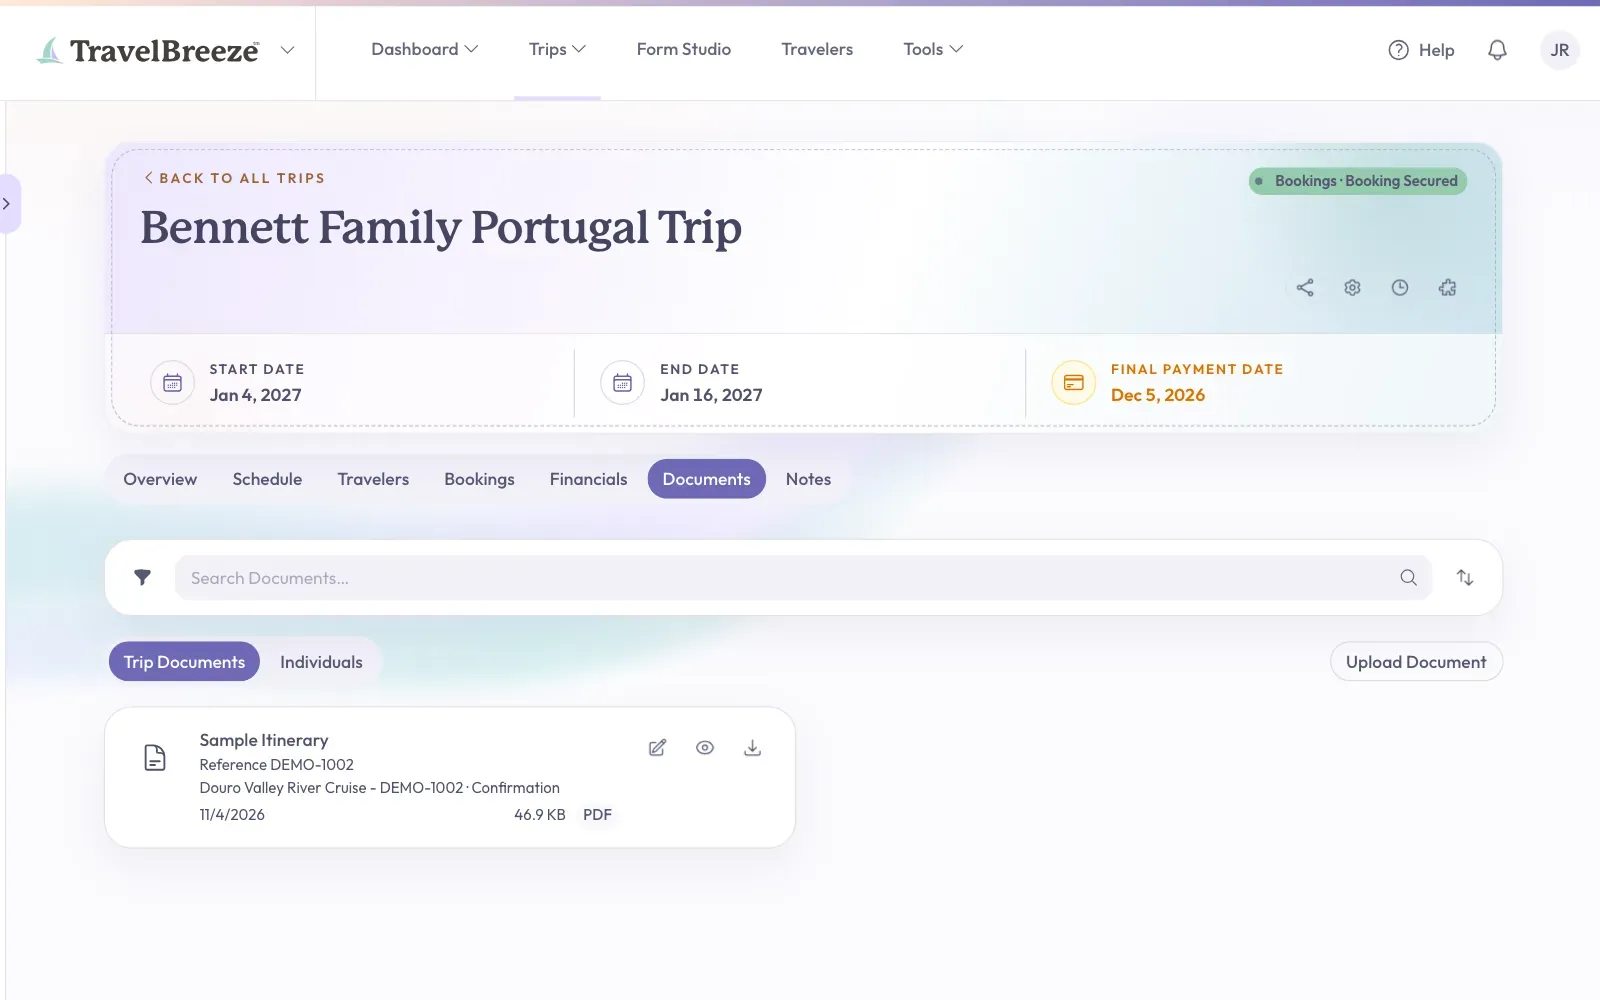
Each file has a card with small buttons on it. Point your mouse at a button to see its name.
- View Document opens the file so you can read it.
- Download Document saves a copy to your computer.
- Update Document lets you change the details, such as Traveler Can View. Click Save when you are done.
Remove A Document
-
Click Update Document on the file's card. It is the button that looks like a pencil on a square.
-
Click the trash can button in the window. Its label is Remove Document.
-
A window called Remove This Document? asks if you are sure. Click Remove Document.
You will see a short message that says "Document removed".
Careful: The file is gone for good. This cannot be undone.
See Each Traveler's Documents
Click Individuals, next to Trip Documents. You will see the files saved on each traveler's own record, such as an insurance document.
- You can view and download them here.
- If someone has no files, their name is listed under "The following travelers have no documents:".
- Click a name in that list to open that traveler's record.
Good to know: The Upload Document button does not show on the Individuals tab. A traveler's own files are saved on their record.
Good to know: Files you upload while creating a booking also show on the Trip Documents tab.
Stuck? Lots of files? Use the Search Documents… box at the top. The funnel button next to it lets you narrow the list by type, booking, or who can see the file.