
You do not have to type every detail by hand. Upload your booking confirmation, and TravelBreeze™ reads it and fills in the booking form. You then check its work, which saves a lot of typing.
Choose The Right File
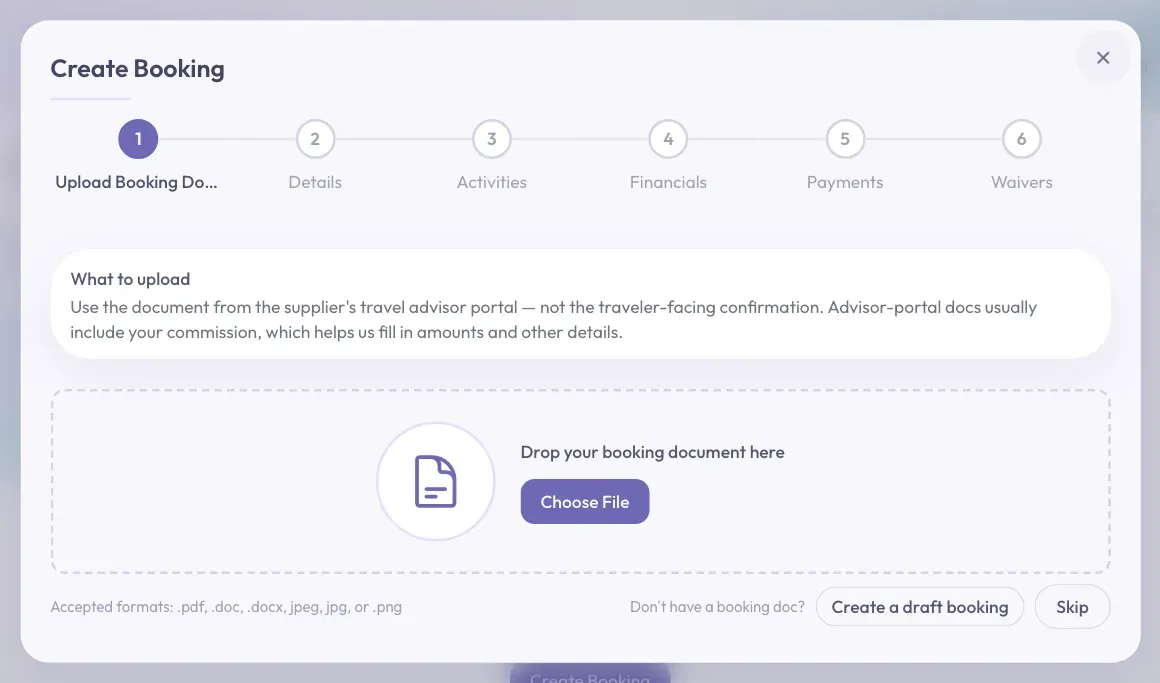
Use the document from the supplier's travel advisor portal. A portal is the website where a supplier lets advisors see their bookings.
Try not to use the confirmation your traveler received. The advisor copy usually includes your commission, which helps TravelBreeze™ fill in the amounts.
You can use one file for each booking. It can be a PDF, a Word file, or a JPEG, JPG, or PNG picture.
Upload Your Confirmation
-
Open the trip and click the Bookings tab under the trip name.
-
Click Create Booking. A window opens on the first step, Upload Booking Document.
-
Click Choose File. You can also drag your file into the dashed box.
-
Your computer shows your files. Click your confirmation, then click Open.
-
Wait while TravelBreeze™ reads it. You will see messages such as "Scanning with AI to read your confirmation…". Large files can take a little longer. Please do not close the window.
-
The Details step opens by itself, with the boxes filled in.
Check What It Filled In
TravelBreeze™ is good at this, but it can make mistakes. Please read each step before moving on. You stay in charge, and nothing is saved as a booking until you click Create Booking at the end.
-
On Details, check the booking number, title, supplier, status, and dates. Click any box to fix it.
-
Scroll down to Travelers and check the names.
-
Click Next at the bottom right of the window.
-
On Activities, check the dates and times.
-
Click Next.
-
On Financials, check the costs and the commission.
-
Click Next.
-
On Payments, check the payment dates and amounts.
-
Click Next.
-
On Waivers, check the answers, and answer any question left empty.
-
Click Create Booking.
You will see a short message that says "Booking created". Your confirmation is now on the trip's Documents tab.
Good to know: A traveler marked New is not in TravelBreeze™ yet. TravelBreeze™ creates them and links them to the trip when you click Create Booking.
Good to know: If TravelBreeze™ finds your supplier, the Supplier box is locked. If that is the wrong one, turn on the Unsupported Supplier switch above it, then type the right name.
If You Uploaded The Wrong File
-
On the Details step, click Back at the bottom left of the window.
-
Find your file's name near the bottom of the window. Click the X next to it.
-
A window asks if you are sure. Click Remove.
-
Click Choose File and pick the right one.
Careful: Only click Back from Details if you want to change your file. If your agency requires a document, you cannot go forward again until you remove the file and upload it again.
Stuck? If you see "Upload failed", try again. If it keeps failing, check that your file is a PDF, Word, JPEG, or PNG file. If the boxes come back mostly empty, you can still type the details yourself. The steps are in Create A Booking.