
A booking is your record of one reservation, such as a cruise, a hotel, or a tour. It keeps the details, the cost, and the payment dates together on the trip.
Every booking belongs to a trip. If you do not have a trip yet, start with Create A Trip.
Open The Create Booking Window
-
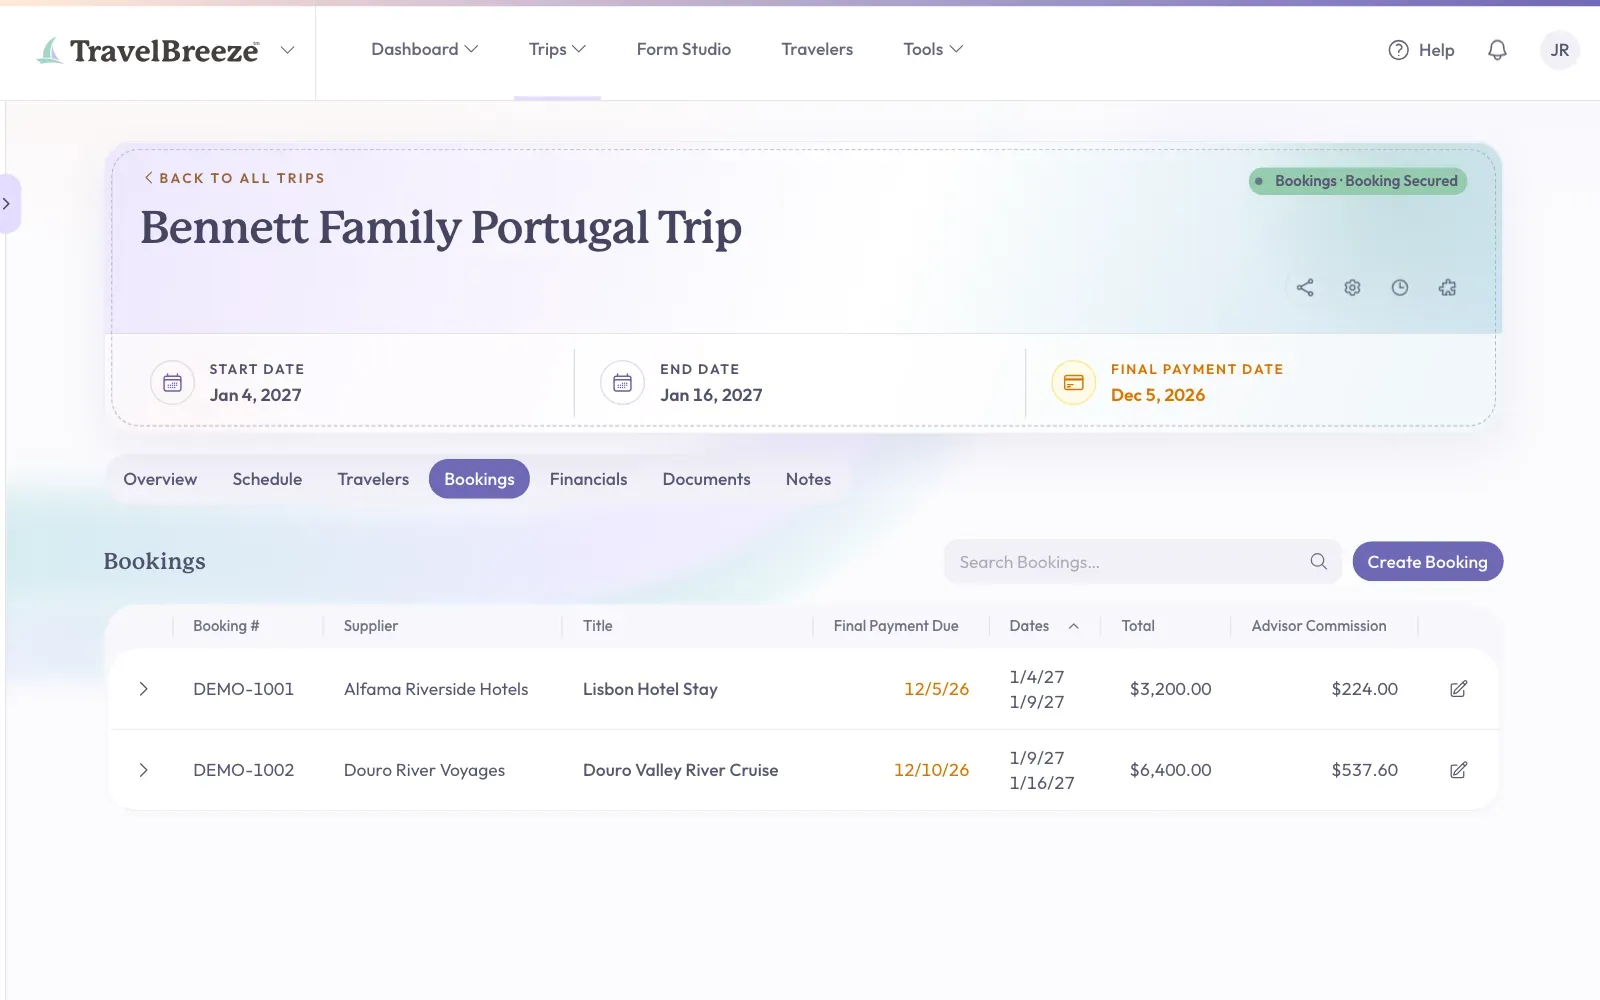
Open the trip. Look at the row of tabs under the trip name and click Bookings.
-
Click Create Booking. If the trip has no bookings yet, the button is in the middle of the page. Otherwise, it is at the top right, next to the search box.
-
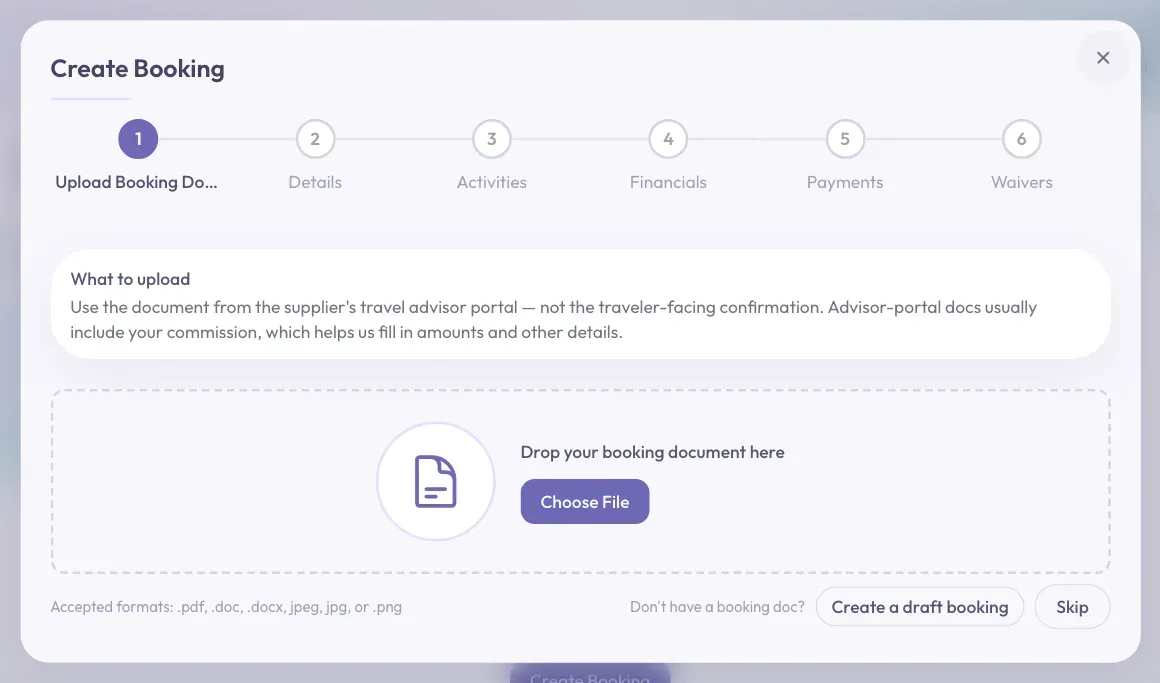
A window called Create Booking opens. Numbered steps run across the top: Upload Booking Document, Details, Activities, Financials, Payments, and Waivers.
Good to know: If you see "You have an unfinished booking for this trip", you started one earlier. Click Resume Draft to carry on.
Careful: Start New throws away that unfinished work, including any file you uploaded for it.
Step 1: Upload Booking Document
-
Click Choose File, then pick your booking confirmation.
-
TravelBreeze™ reads the file, fills in what it can, and moves you to Details by itself. For help with this step, read Fill In A Booking From A Confirmation.
Stuck? Have no file? Look for a Skip button or a Create a draft booking button. You will only see Skip if your agency does not require a document. You will only see Create a draft booking if your agency allows drafts. If you see neither, you need a document, or you can ask your agency owner or admin.
Step 2: Details
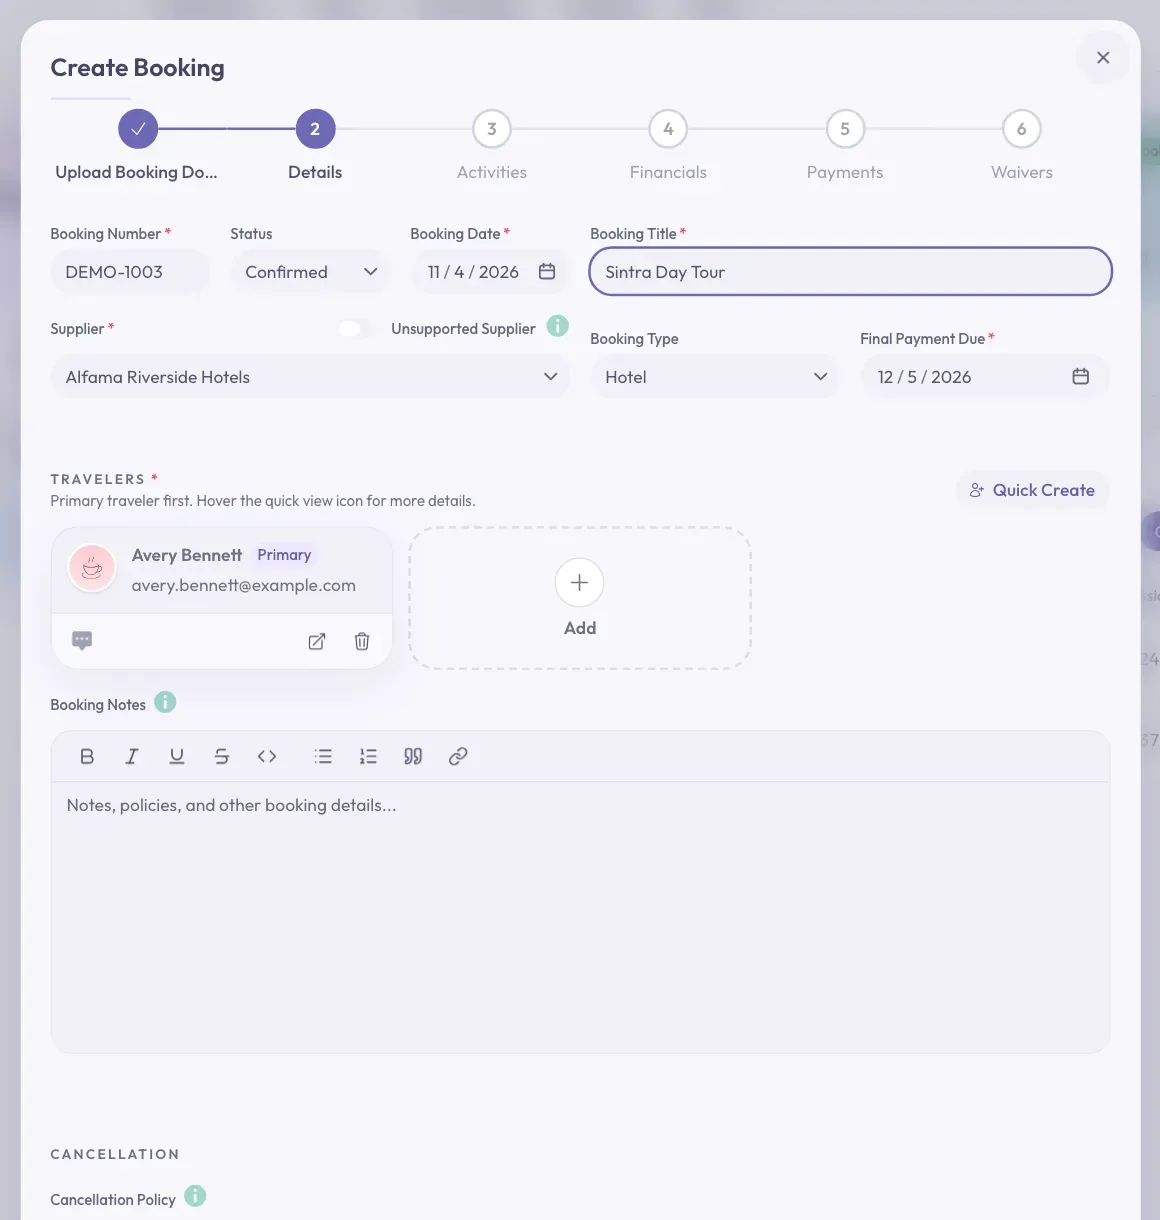
Boxes marked with a star are required. If you uploaded a file, check what is already filled in.
-
Booking Number: Type the number from your supplier.
-
Status: This starts on Confirmed. Change it only if that is not true.
-
Booking Date: This starts on today. Change it if you booked on another day.
-
Booking Title: Type a short name. For example, "Mediterranean Cruise".
-
Supplier: Click the box and choose the company you booked with.
-
Booking Type: Choose the kind of booking, such as Cruise or Hotel.
-
Final Payment Due: Choose the day the last payment is due.
-
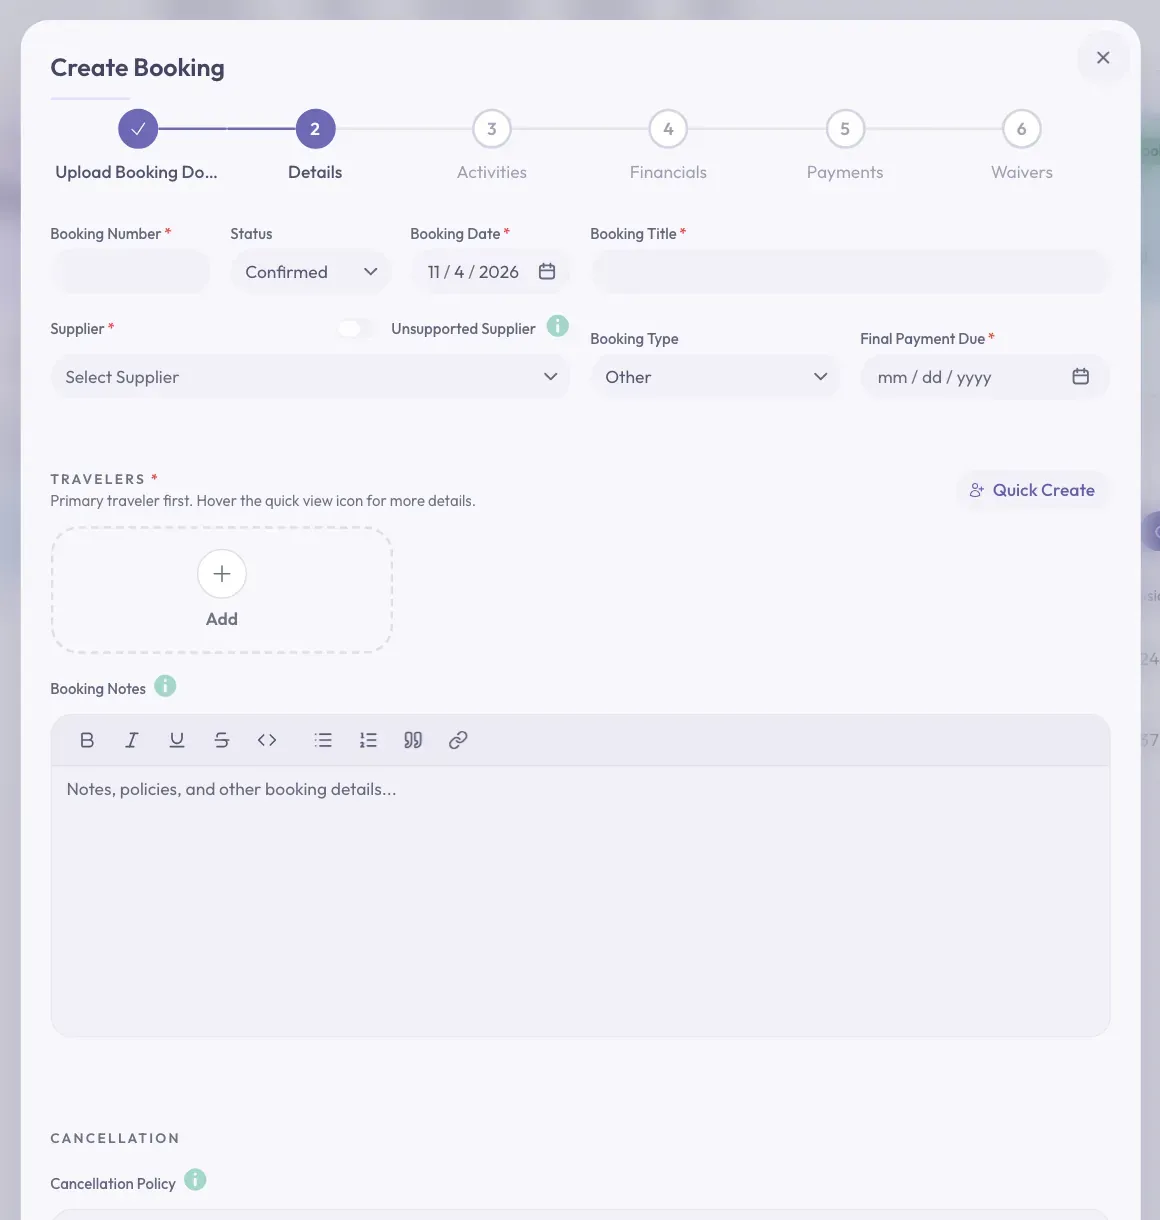
Travelers: Scroll down to this section. Click the Add square, then click a name. The first person is the primary traveler. Choose everyone on this booking.
-
Click Next at the bottom right of the window.
Good to know: Is your supplier not on the list? Turn on the Unsupported Supplier switch above the box, then type the name.
Good to know: Booking Notes are for you and your team. Your traveler does not see them.
Step 3: Activities
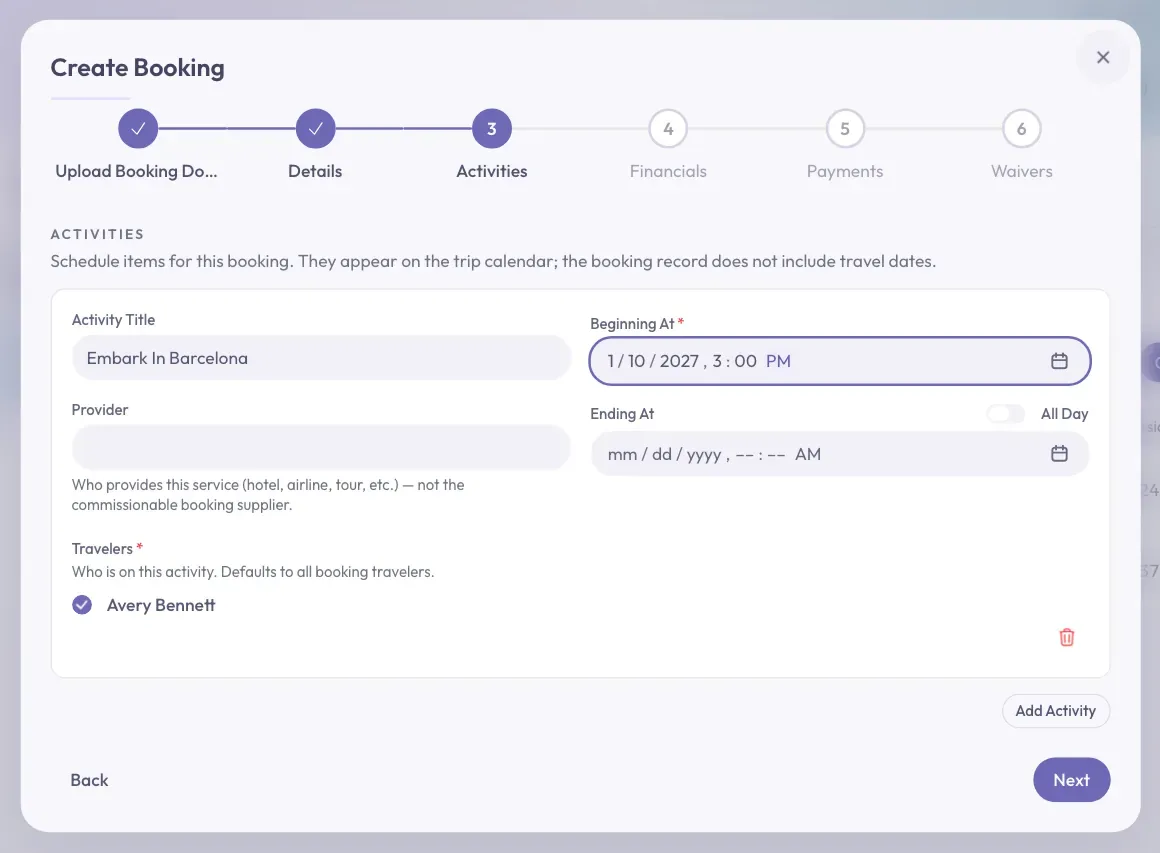
An activity is one item on the trip's calendar. Booking dates live here, on the activities, not on the booking itself.
-
Click Create Activity.
-
Type a name in Activity Title. For example, "Embark In Barcelona".
-
Click Beginning At and choose the date and time. This is required.
-
Choose Ending At if you know it.
-
To include another, click Add Activity and repeat these steps.
-
Click Next.
Good to know: If you chose Insurance as the booking type, this step is skipped.
Stuck? "At least one activity with Beginning At is required" means you still need one activity with a start date.
Step 4: Financials
-
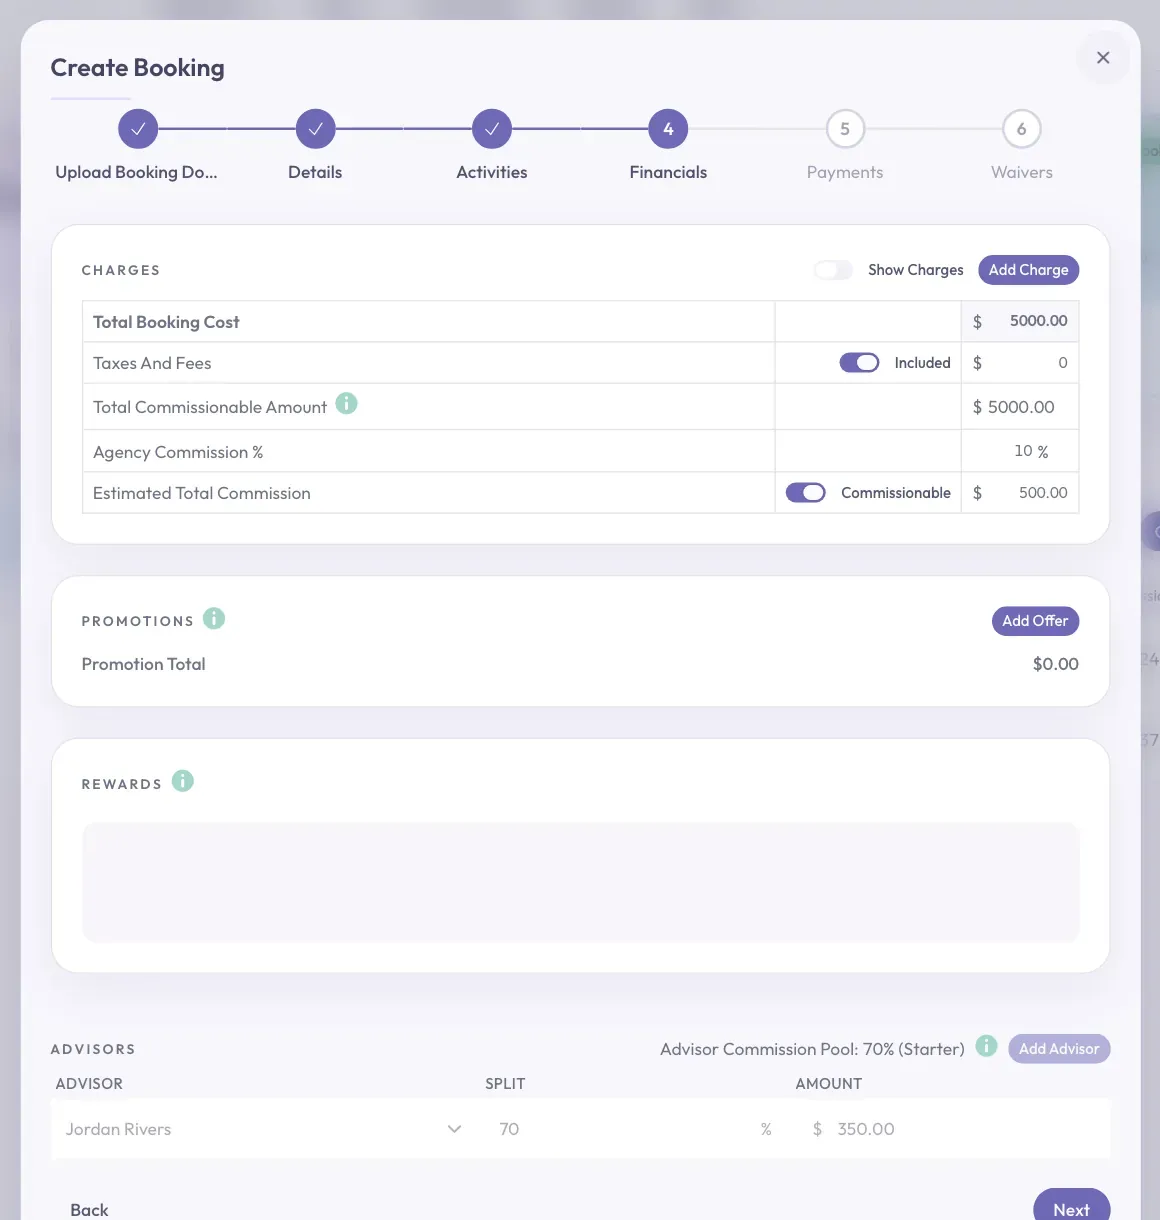
Under Charges, click Add Charge to list each cost. This part is optional.
-
Type the full cost in Total Booking Cost, inside the same table. This is required.
-
Look at Agency Commission %. It may already be filled in from your supplier. If it is empty, type the percent.
-
Check Estimated Total Commission. This is what your agency should earn on this booking.
-
Scroll down to Advisors and check the names and amounts.
-
Click Next.
Good to know: If this booking earns no commission, turn off the Commissionable switch in the Charges table.
Good to know: A small help icon appears beside Total Booking Cost if your charges do not match it. Point at the icon to see how far off you are.
Step 5: Payments
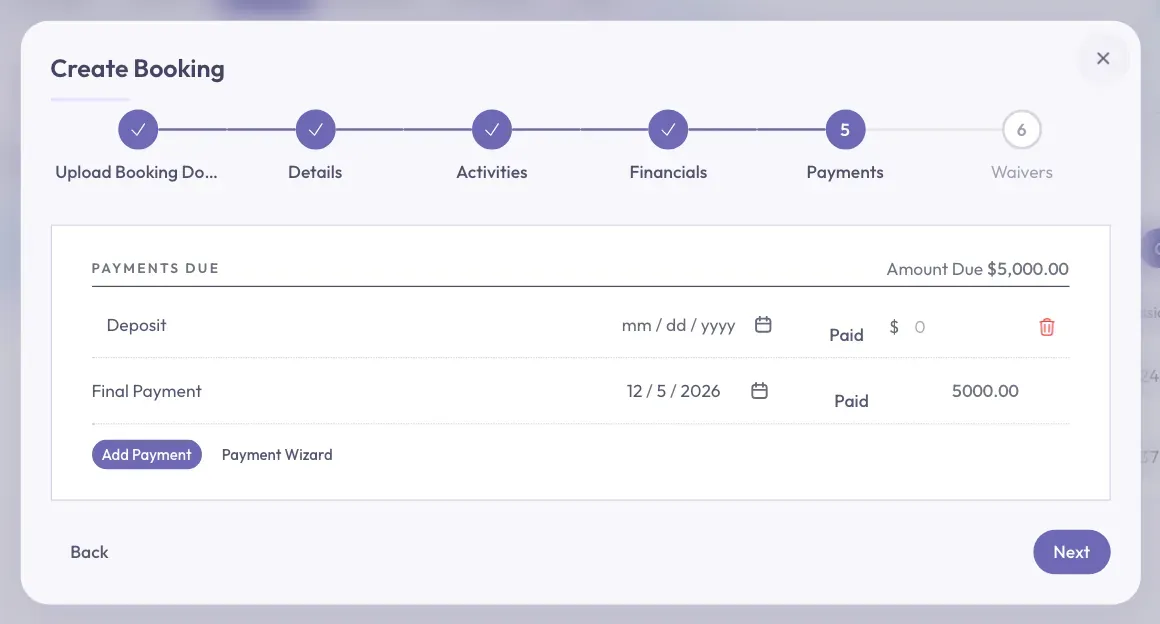
This step shows what is owed and when. The Final Payment row is already there, using your Final Payment Due date.
-
If there is a deposit or another payment, click Add Payment.
-
Type a description, a date, and an amount.
-
If it has been paid, check the Paid box.
-
Click Next.
Good to know: Have many payments to enter? Payment Wizard can create a whole payment schedule for you.
Step 6: Waivers
-
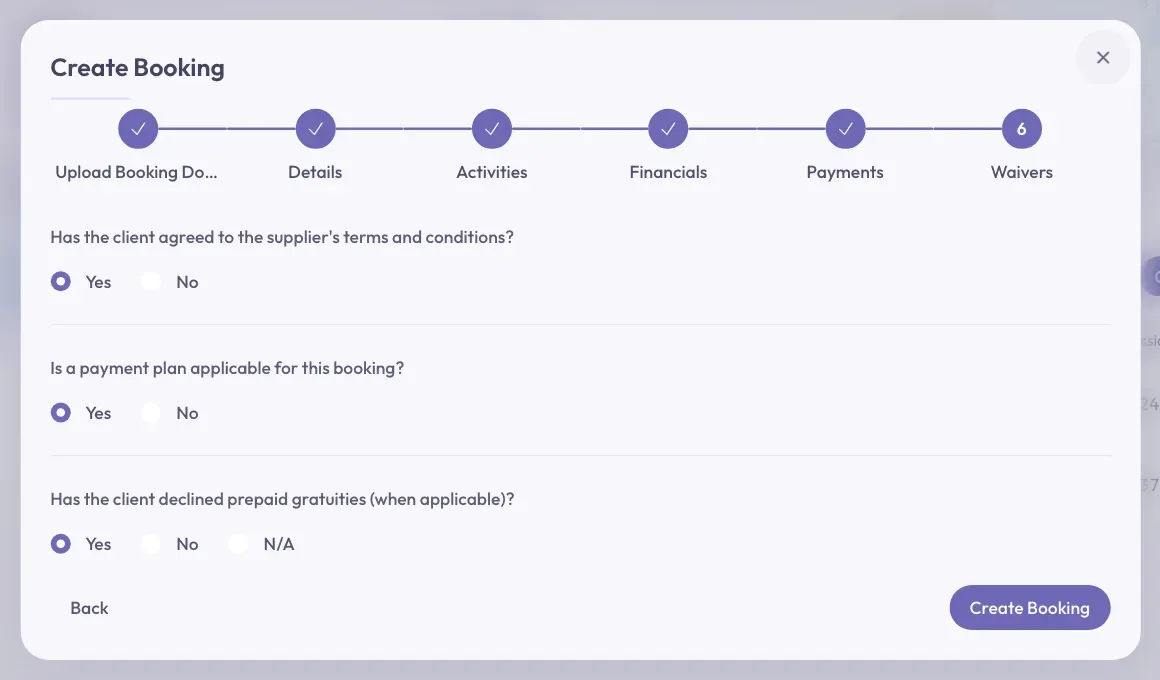
Answer each of the three questions. You must answer all of them.
-
Click Create Booking at the bottom right of the window.
Good to know: If your dates fall outside the trip's dates, TravelBreeze™ may offer to change the trip. Click the button that starts with Yes to accept, or click No, Keep Trip Dates.
How You Know It Worked
You will see a short message that says "Booking created". The window closes, and your booking is listed on the Bookings tab. Its activities now show on the Schedule tab.
Next, you can check what you will earn, or share the trip with your traveler.
Stuck? Need to stop partway? Click the X at the top right of the window. Your work is kept. Click Create Booking later, then click Resume Draft.