
A trip is like a folder for one vacation. It keeps the travelers, bookings, schedule, tasks, and documents together, so you never have to hunt for them.
Create Your Trip
-
Look at the menu at the top of the page. Click Trips.

-
Click All Trips in the menu that opens.
-
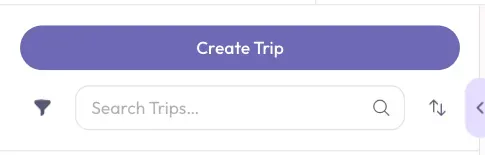
Look at the left side of the page, above your list of trips. Click the Create Trip button.
-
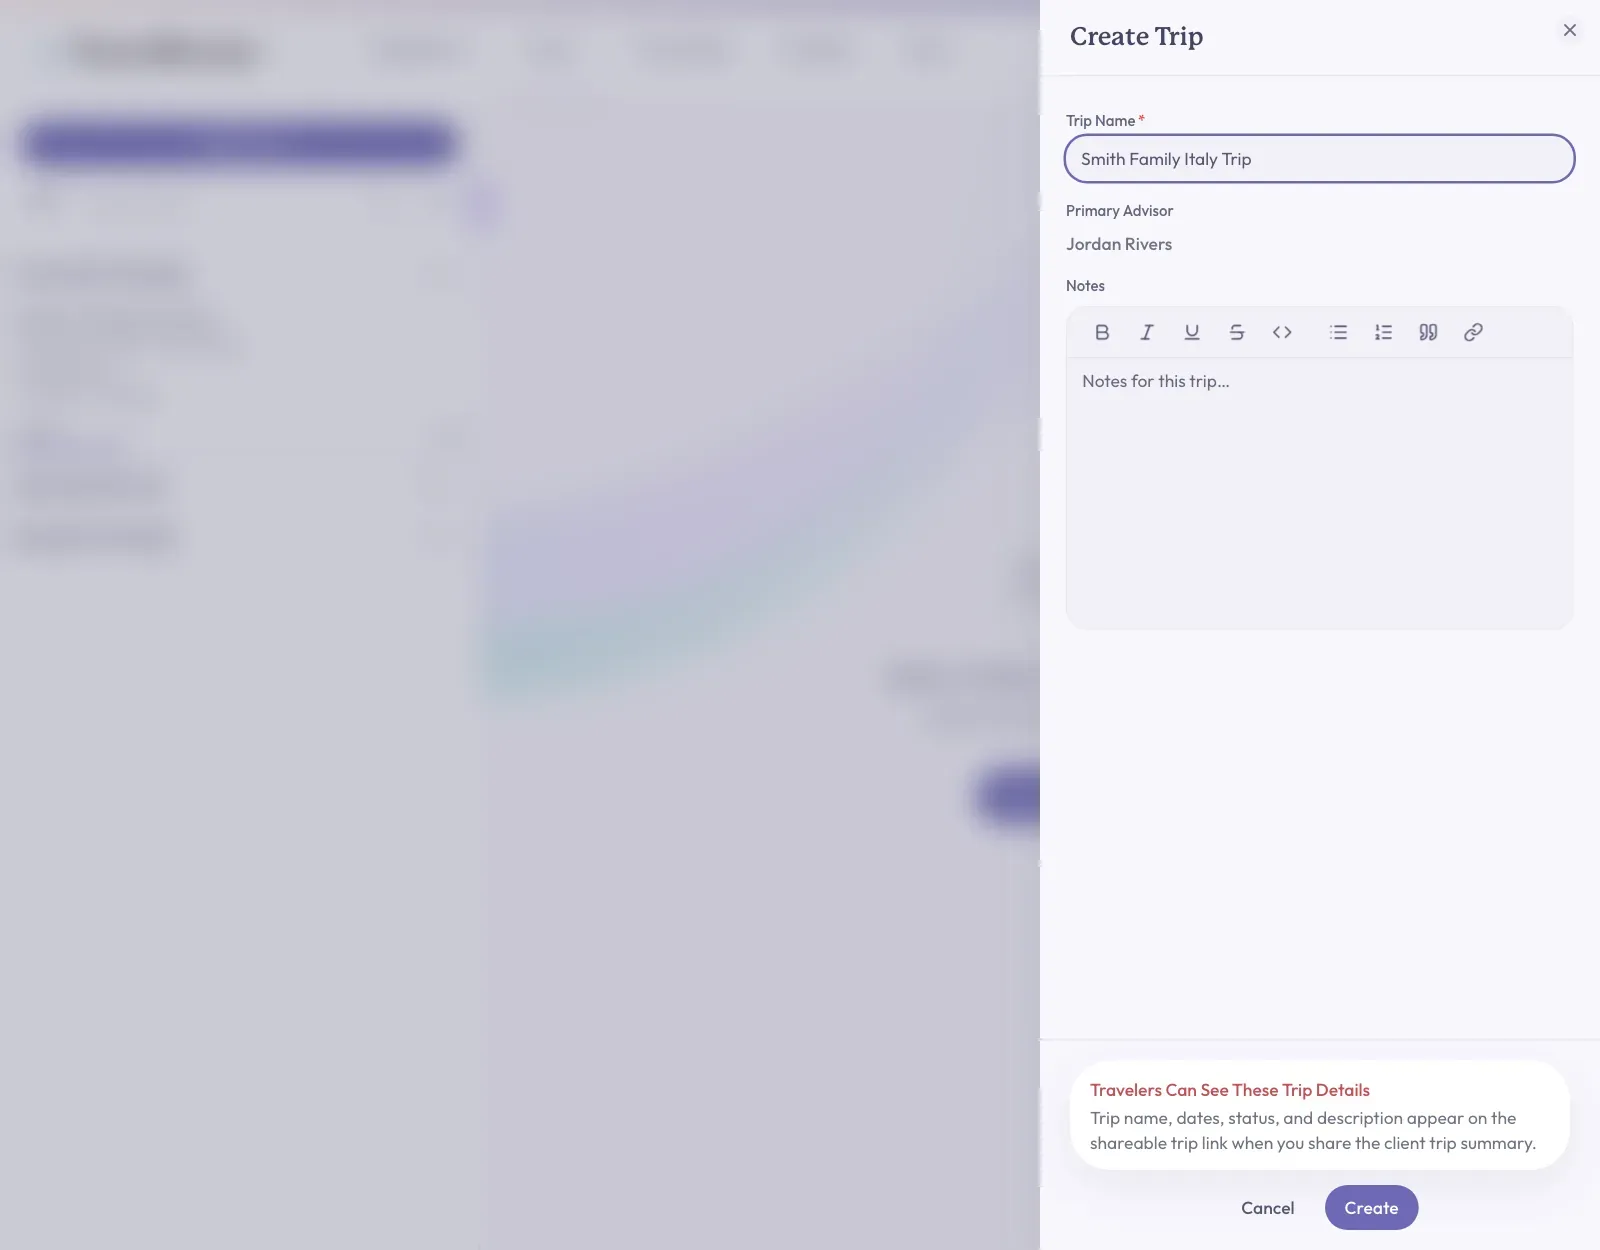
A panel slides in from the right side of the screen. Click inside the box labeled Trip Name.
-
Type a name you will recognize later. For example, "Smith Family Italy Trip".
-
Look at Primary Advisor. This is the person in charge of the trip. If you are an advisor, it shows your name. If you are an agency owner, admin, or staff member, you can choose someone from the list.
-
The Notes box is optional. You can leave it empty.
-
Click Create at the bottom right corner of the panel.
Good to know: The Create button stays gray until you type a trip name.
Careful: Your traveler can read what you type in Notes here if you share the trip page. That is what the red Travelers Can See These Trip Details message means. For private notes, use the Notes tab on the trip page instead.
What Happens Next
Your new trip page opens. A window called Create Booking also opens on top of it by itself. This is normal.
- If you have a booking ready, follow Create A Booking.
- If you do not, click the X at the top right corner of that window. Your trip is already saved.
You should now see your trip name at the top of the page. Below it is a row of tabs: Overview, Schedule, Travelers, Bookings, Financials, Documents, and Notes.
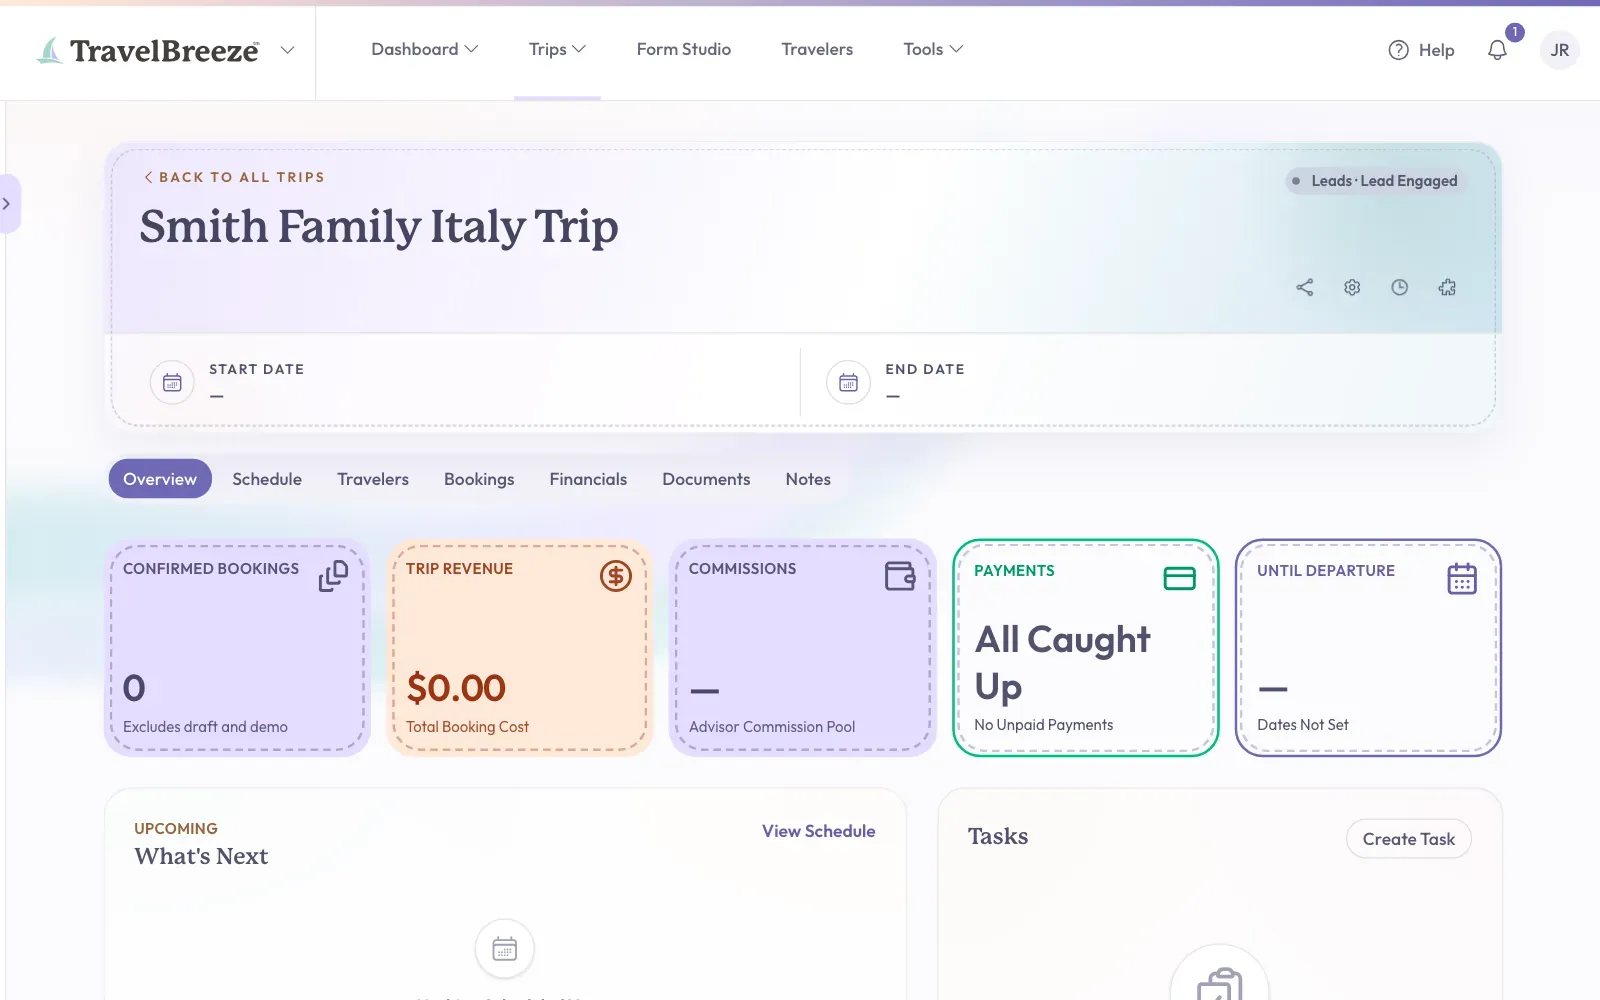
Your trip has no travelers yet. To fix that, read Link Travelers To A Trip.
Set The Trip Dates
-
Look at the top of the trip page, under the trip name. On the right side are some small buttons. Click the one that looks like a gear.

-
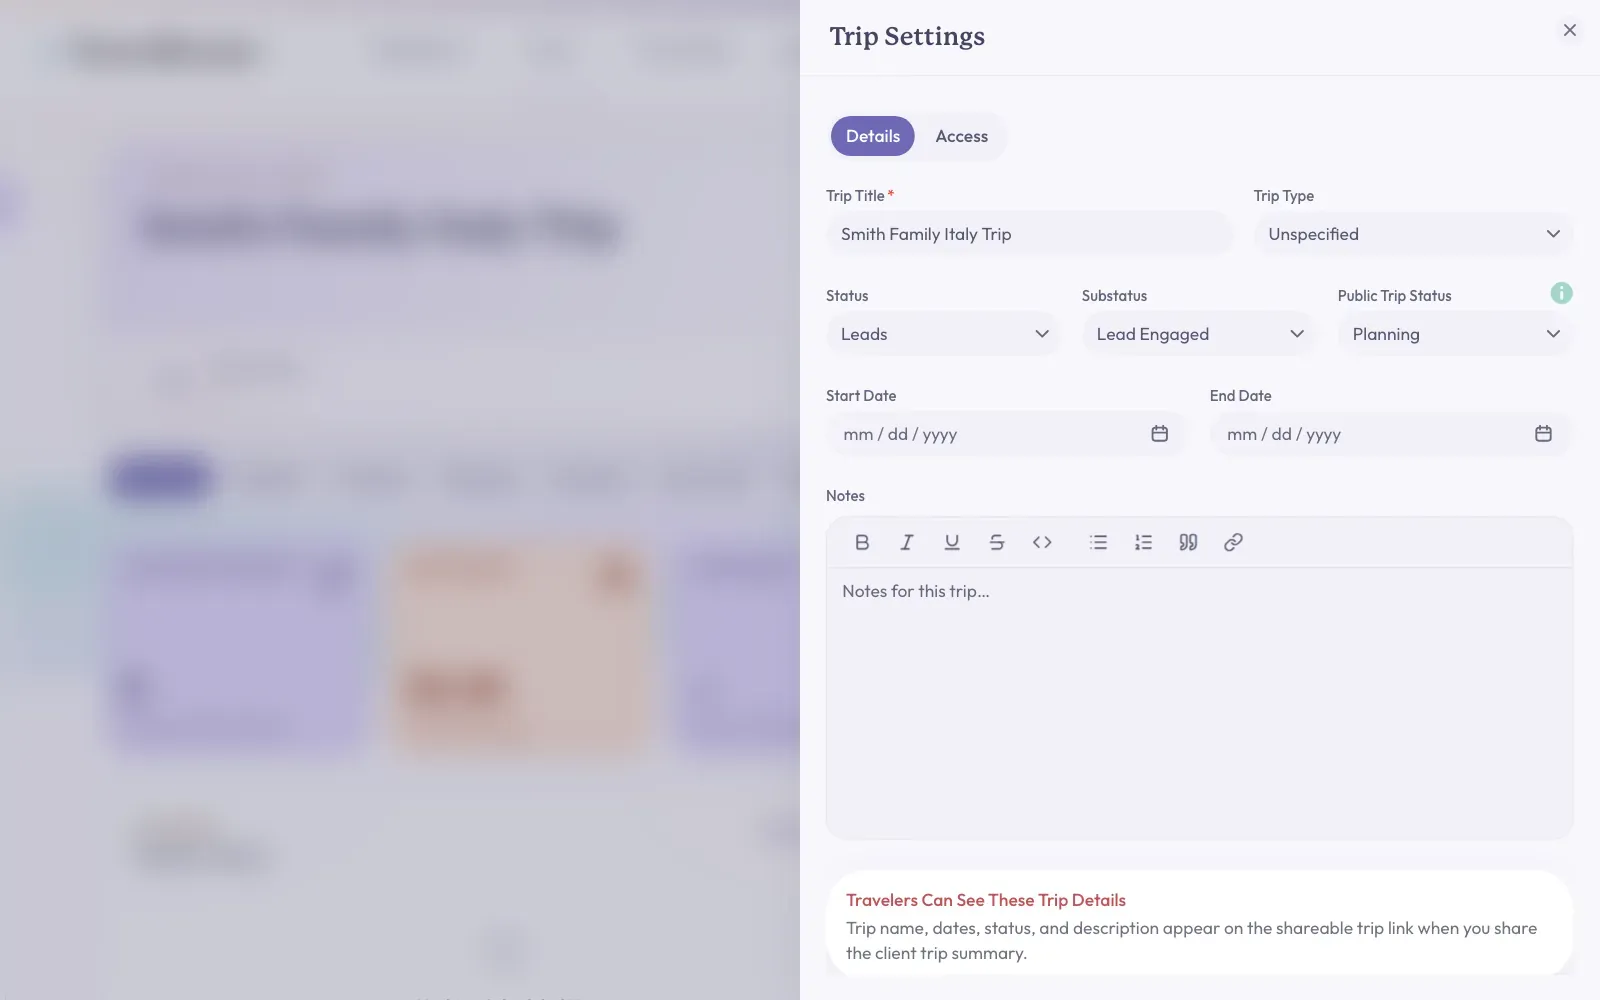
A panel called Trip Settings opens on the Details tab. Click the Start Date box and choose the day the trip begins.
-
Click the End Date box and choose the day the trip ends.
-
Scroll down and click Save Settings at the bottom right of the panel.
The button shows a check mark and says Saved. Your dates now show at the top of the trip page.
Good to know: You can skip this for now. When you create a booking with dates, TravelBreeze™ offers to set the trip dates for you.
Good to know: Who can change Trip Settings? The trip's primary advisor, and agency owners, admins, and staff.
Find Your Trip Later
-
Click Trips at the top of the page, then click All Trips.
-
Click inside the Search Trips… box above your list.
-
Type part of the trip name.
-
Click the trip in the list.
Stuck? Canceled and archived trips are hidden from this list at first. Click the funnel button to the left of the search box. Then click Canceled or Archived so they show up.
If You No Longer Need A Trip
Open Trip Settings with the gear button. Scroll down to Archive Or Remove Trip. You have two choices.
- Archive Trip hides the trip from your active lists but keeps all of its records.
- Remove Trip removes the trip for good, along with its bookings and activities. A message asks you to confirm first. This cannot be undone.
Careful: If in doubt, choose Archive Trip. You will see Trip Cannot Be Removed when a trip has a booking that cannot be removed.