
A form is a list of questions. Build it here, save it, and you can send it to as many travelers as you like.
Start Your Form
There are three ways to start.
Build it yourself:
-
Look at the top of the page and click Form Studio.
-
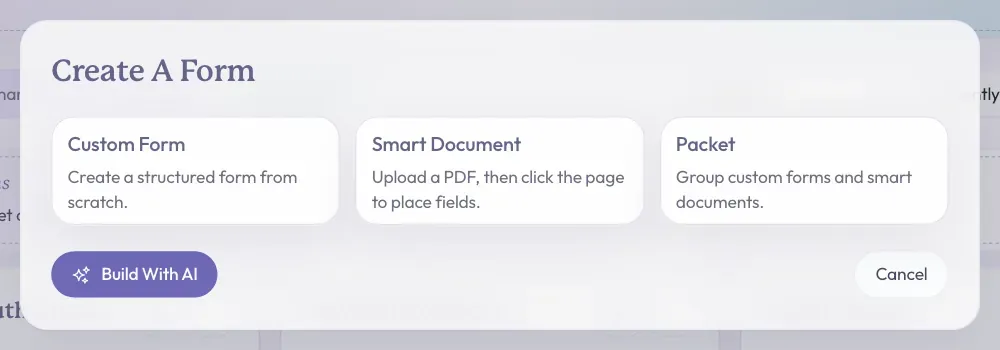
Click Create A Form at the top right of the page. A window opens.
-
Click Custom Form. The builder opens.
Copy a ready-made form:
-
On the Forms tab, scroll down to Start From A Template.
-
Click Use This next to the form you want. Your own copy opens in the builder.
Ask AI for a first draft:
-
Click Create A Form at the top right of the page.
-
Click Build With AI at the bottom left of the window.
-
Under What Kind Of Form Would You Like To Build?, describe your form in your own words.
-
Click Build Form. Wait a moment. To stop it, click Stop.
Your new form opens in the builder, already saved. AI can make mistakes, so read every question before you send it. Check any disclaimers most of all.
Find Your Way Around The Builder
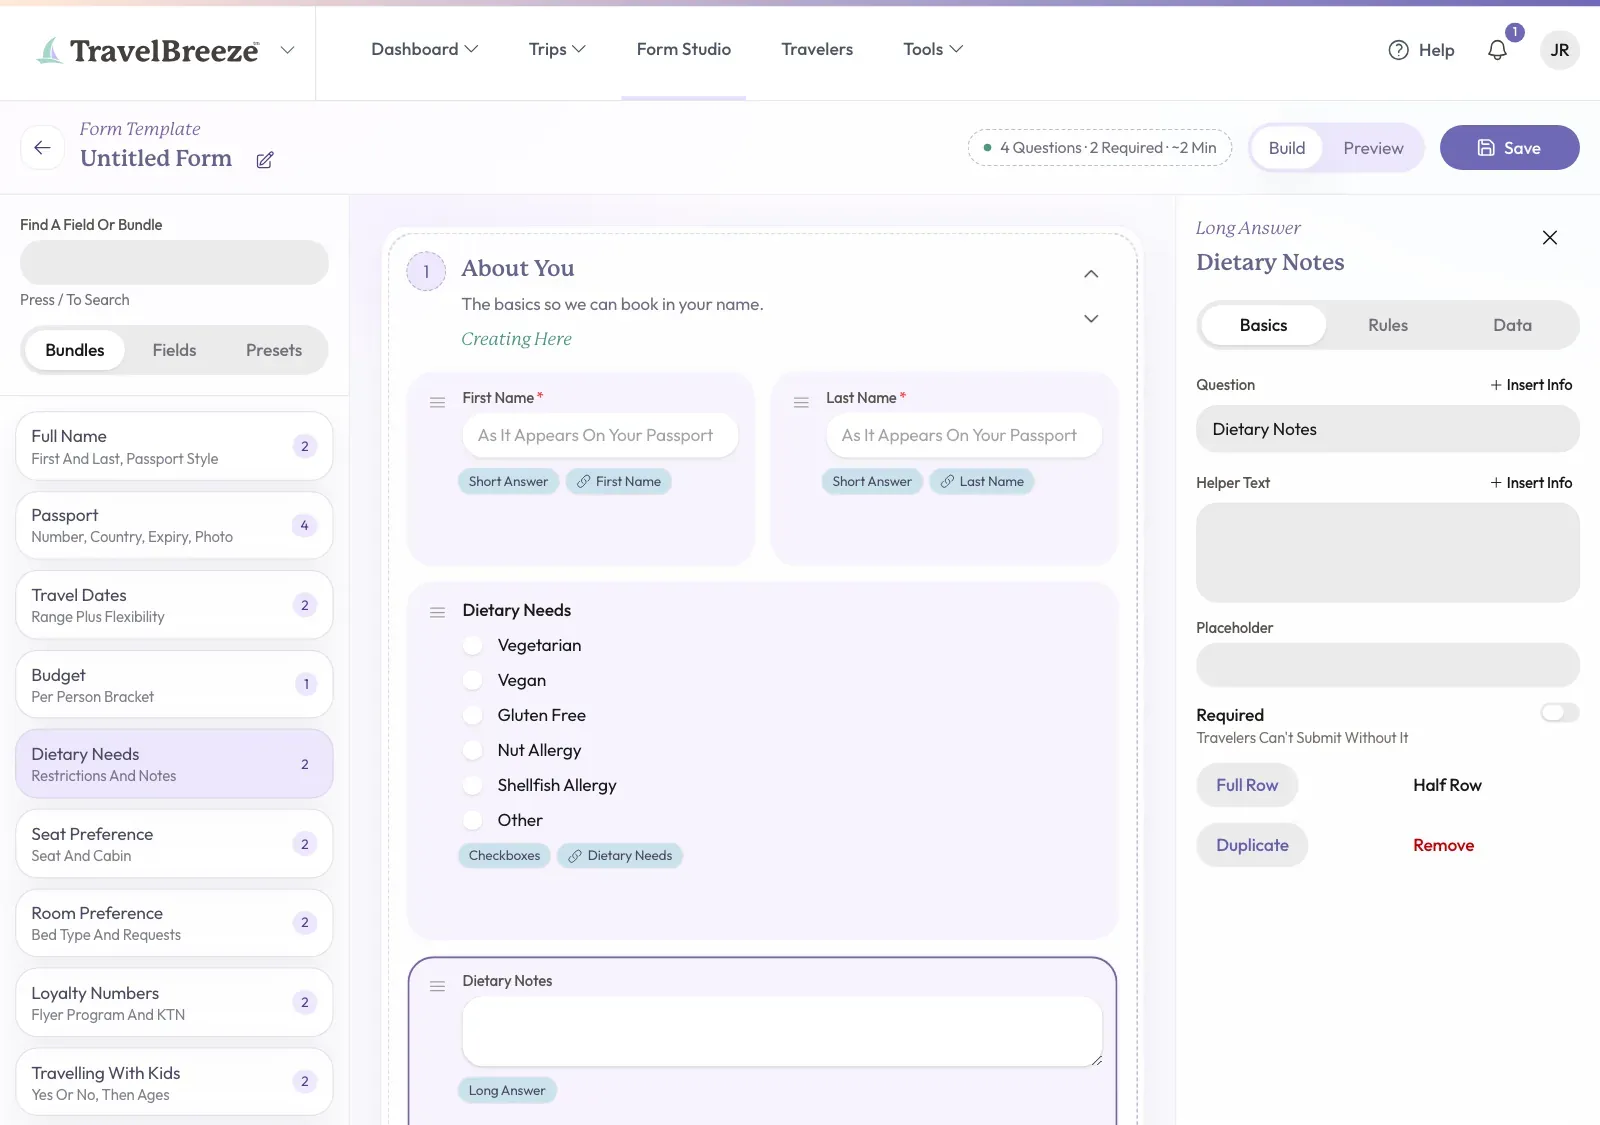
- The left side holds what you can add. It has three tabs: Bundles, Fields, and Presets.
- The middle shows your form.
- The right side shows the settings for whatever you clicked.
- The top has the title, Build, Preview, and Save.
Add Your Questions
-
Click the title at the top of the page. Type a name, like "Client Intake".
-
On the left side, click Bundles, Fields, or Presets.
-
Click the one you want. It appears on your form.
Here is what each tab holds:
- Bundles are groups of travel questions, ready to use. Examples are Passport, Dietary Needs, and Emergency Contact.
- Fields are single questions. Examples are Short Answer, Date, Dropdown, Yes Or No, and Signature.
- Presets are groups of questions that stay together as one card. Credit Card Auth is here. So are any presets from your agency, under Your Agency.
To find something fast, type in the Find A Field Or Bundle box at the top left.
Careful: To collect a credit card, use only Credit Card Auth. Saving fails if another question asks for a card number or security code. Read Collect A Credit Card Authorization.
Change A Question
-
Click the question in the middle of the page. Its settings open on the right side.
-
Type your words in the Question box. Use Helper Text for a small hint under it.
-
Click Required if your traveler must answer it.
The right side has three tabs for a question:
- Basics holds the words, Required, and the width. It also has Duplicate and Remove.
- Rules has Only Show This When. Use it to show a question only after a certain answer.
- Data has Sensitive Information, which hides an answer until someone chooses to see it. It also has Save Answer To Traveler Profile, and Move To Section.
To move a question, drag it by the small lines on its card.
Fill In Details With Insert Info
Your questions can include details like the traveler's name, so you do not have to type them each time.
-
Click in the box where you are typing a question.
-
Click Insert Info next to the box.
-
Choose what to add. Traveler has First Name, Last Name, and Full Name. Trip has Name, Start Date, and End Date. Agency and Advisor each have Name.
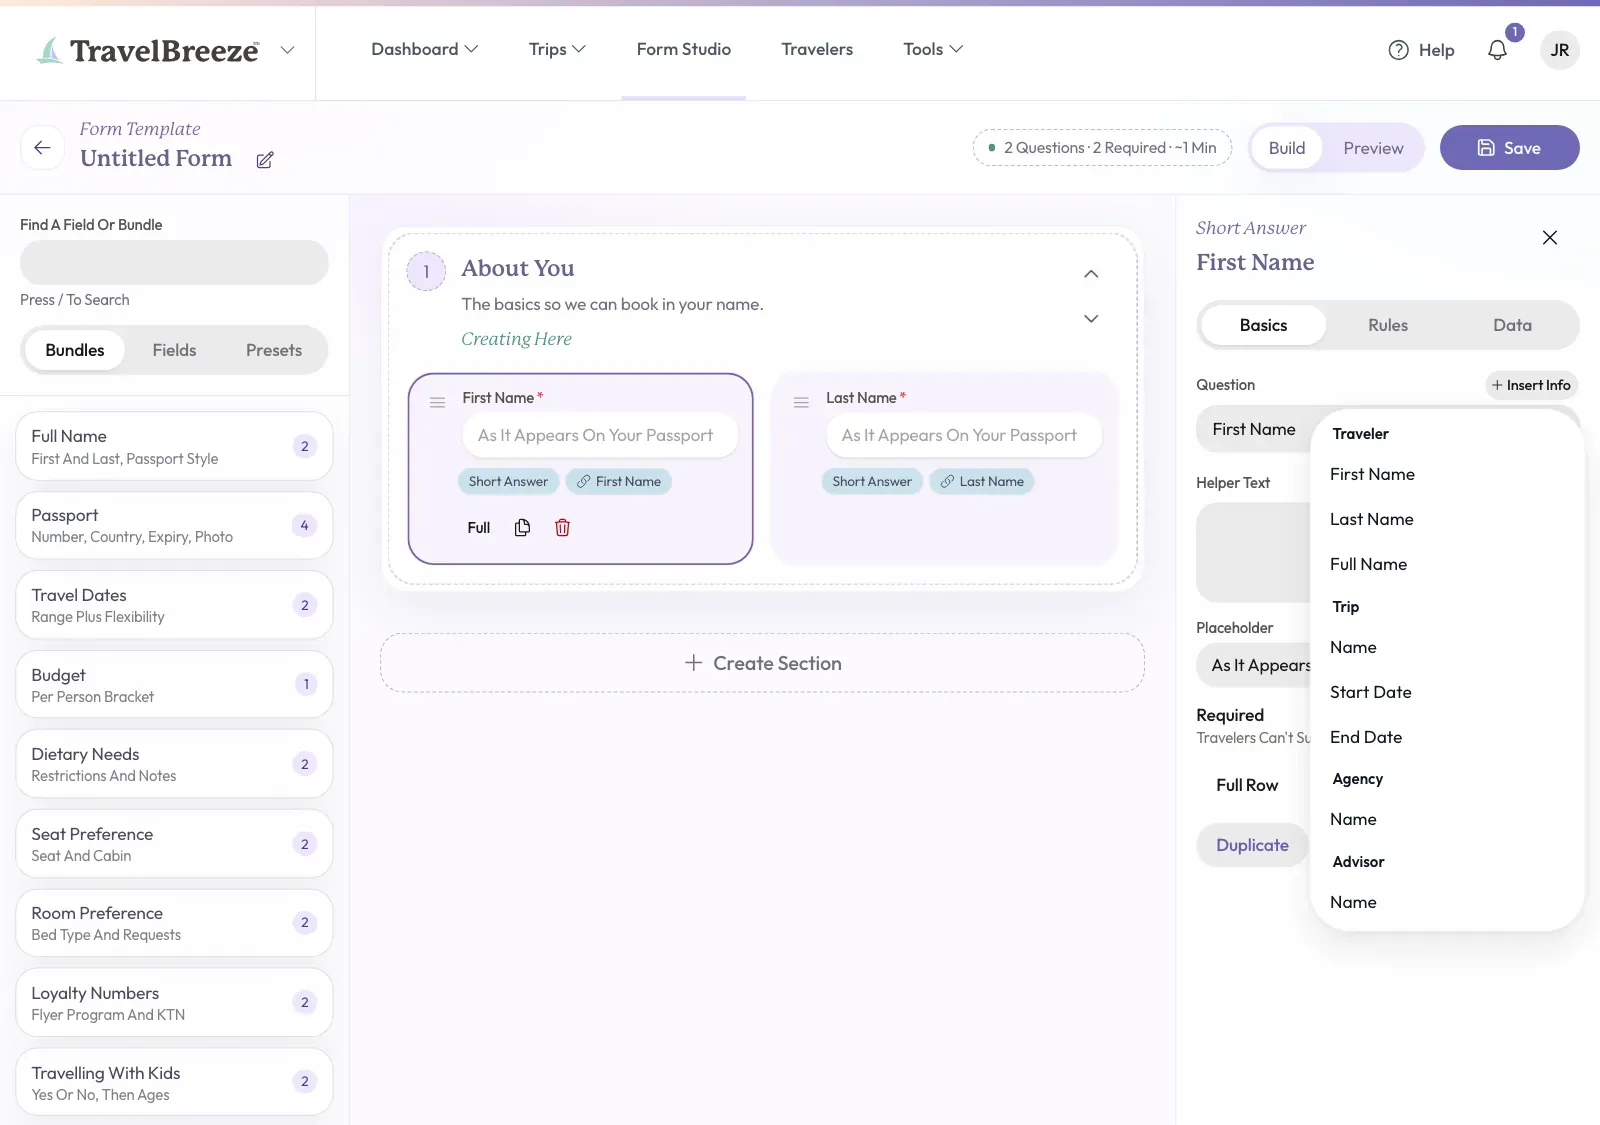
It shows as a small label while you build. Your traveler sees the real words.
Good to know: If you use Trip details, you must choose a trip when you send the form.
Choose What Your Traveler Sees
When no question is selected, the right side shows Whole Form. If a question is selected, click the small back arrow at the top of the right side.
- Tags helps you sort your forms. Type a word, then press Enter.
- Show Agency Details and Show Advisor Details put those details at the top of the form.
- Repeat For Each Traveler asks the same questions once for each person.
- Button Text is the words on the last button.
- Thank-You Message is what your traveler sees when they finish.
To add another group of questions, click Create Section in the middle of the page.
Check It And Save It
-
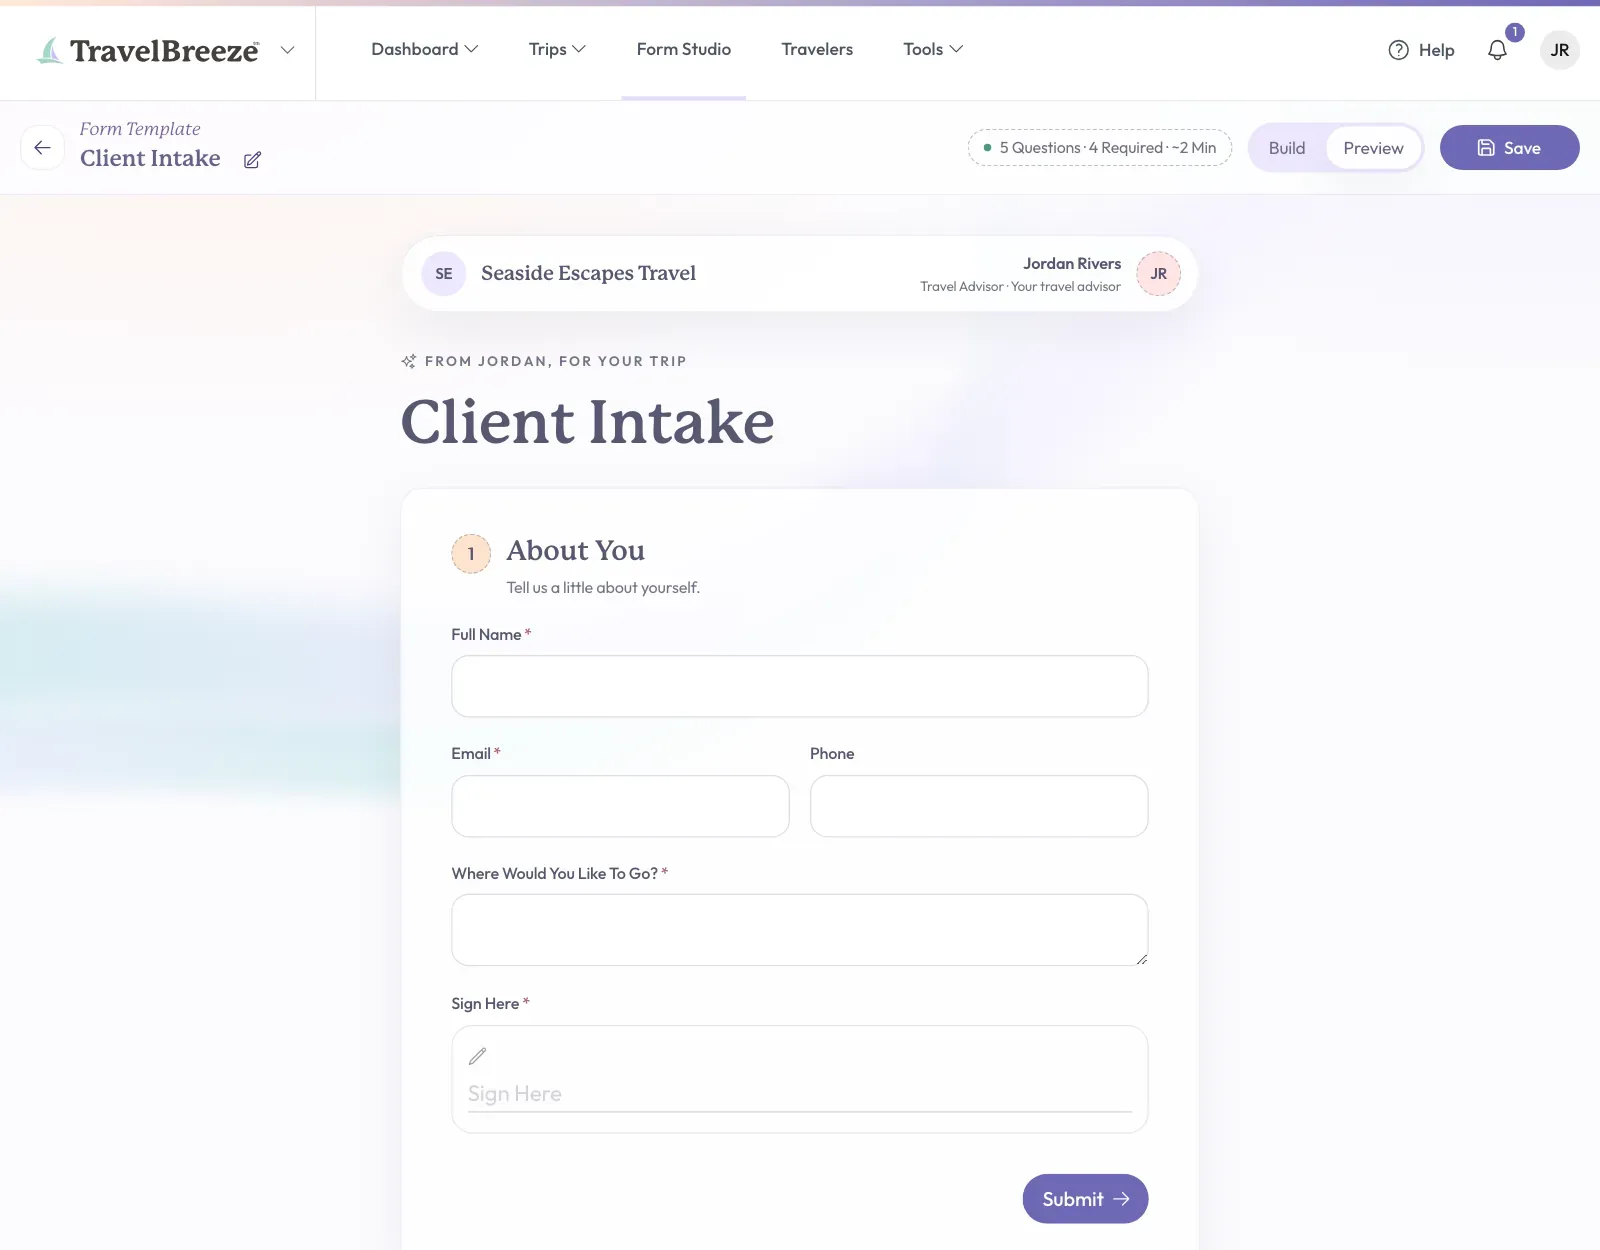
Click Preview at the top right. This shows the form as your traveler will see it.
-
Click Build to go back.
-
Click Save at the top right corner of the page.
The button turns green and says Saved. If it turns red and says Could Not Save, read the message that appears.
Change Or Copy A Form Later
-
On the Forms tab, find your form's card.
-
Click the button with three dots at the top right of the card.
-
Click Update to change it, Duplicate to copy it, or Remove to take it away.
Good to know: Forms you already sent do not change when you update a form. Removing a form does not stop requests you already sent.
What To Do Next
Your form is ready to go. Read Send A Form To A Traveler.