
An invoice is your record of what a traveler owes. It lists who pays, how much, and when. It helps you see what is paid and what is still due.
Good to know: TravelBreeze™ does not email an invoice for you, and it does not take payments. It keeps the record for you and your traveler.
Good to know: You'll only see trips on a paid plan.
Check For An Invoice First
TravelBreeze™ creates an invoice by itself when you add a booking with a price. You may already have the one you need.
-
Look at the top of the page and click Trips.
-
In the menu that opens, click All Trips.
-
Find your trip in the list and click it.
-
Near the top of the trip page, click Financials.
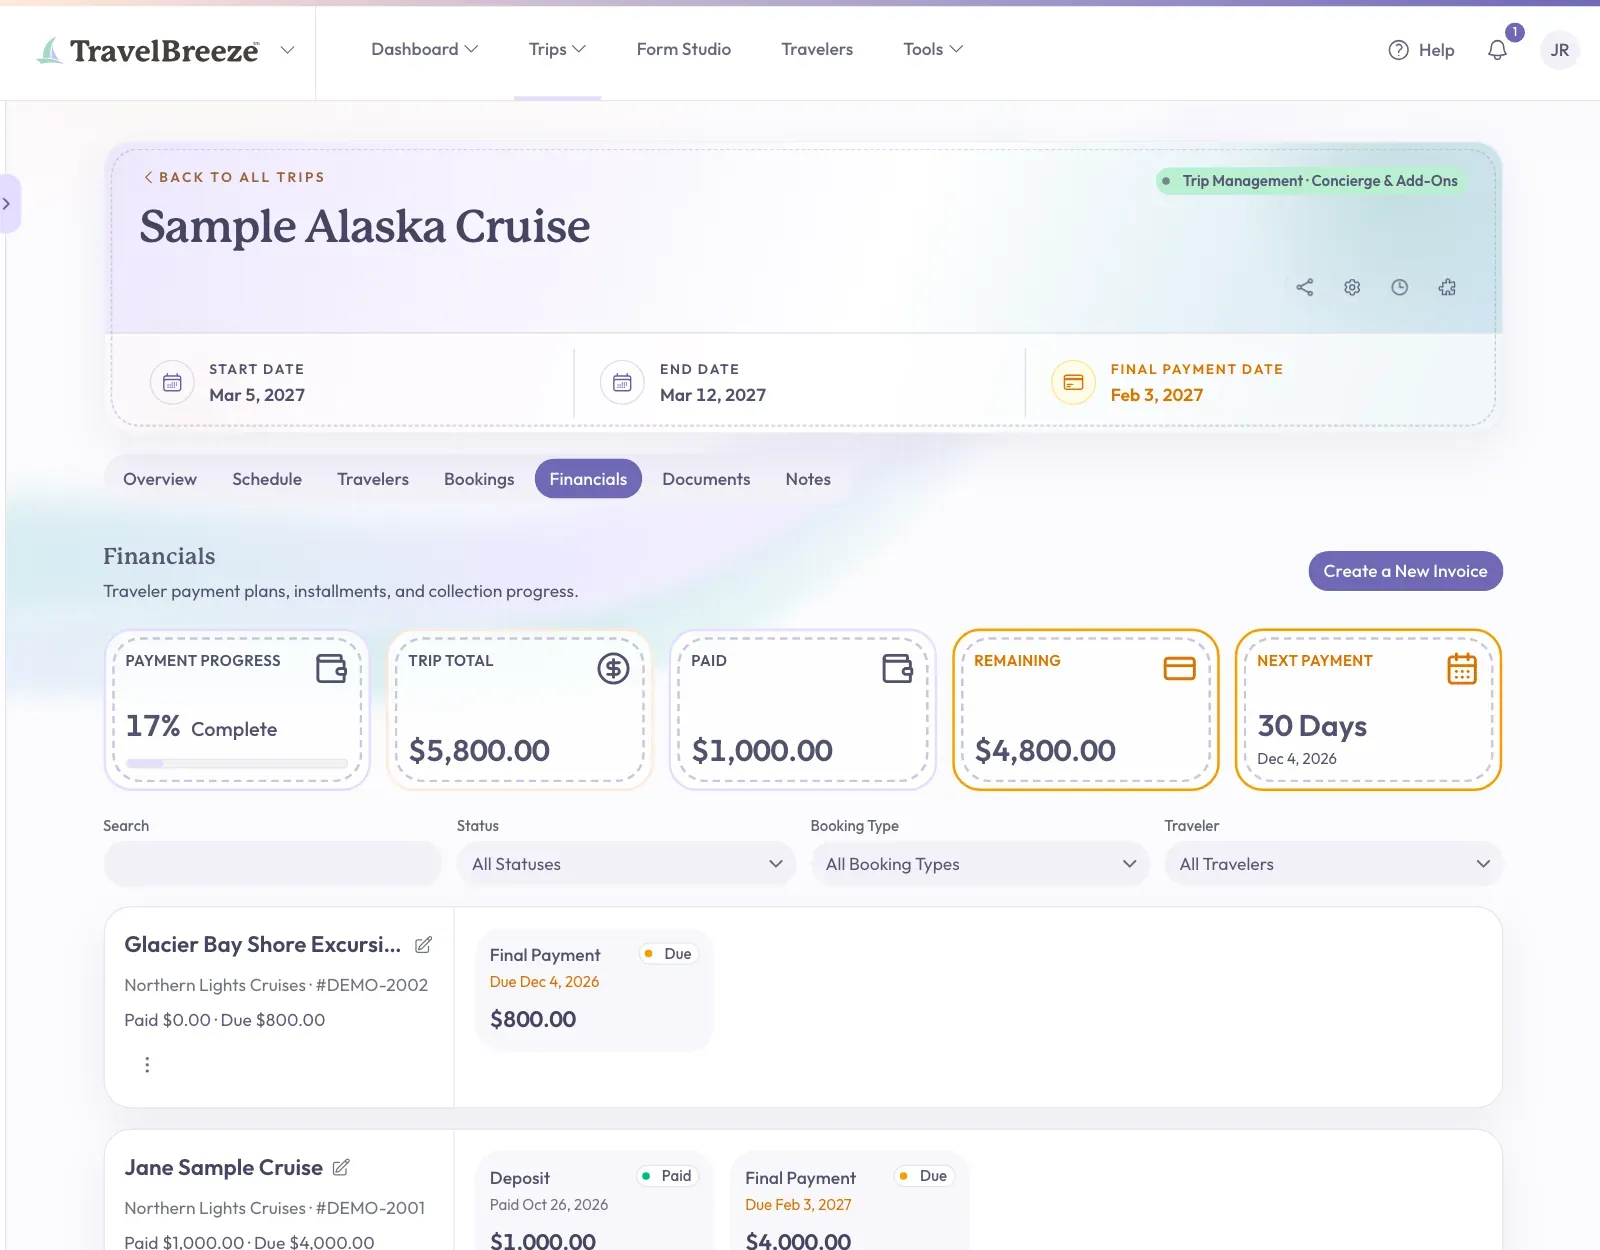
If you see the invoice you need, you may only need a payment plan. Read Set Up A Payment Plan.
Create A New Invoice
Start on the trip's Financials tab. A window with four steps will walk you through it.
-
Click Create a New Invoice at the top right of the Financials area.
-
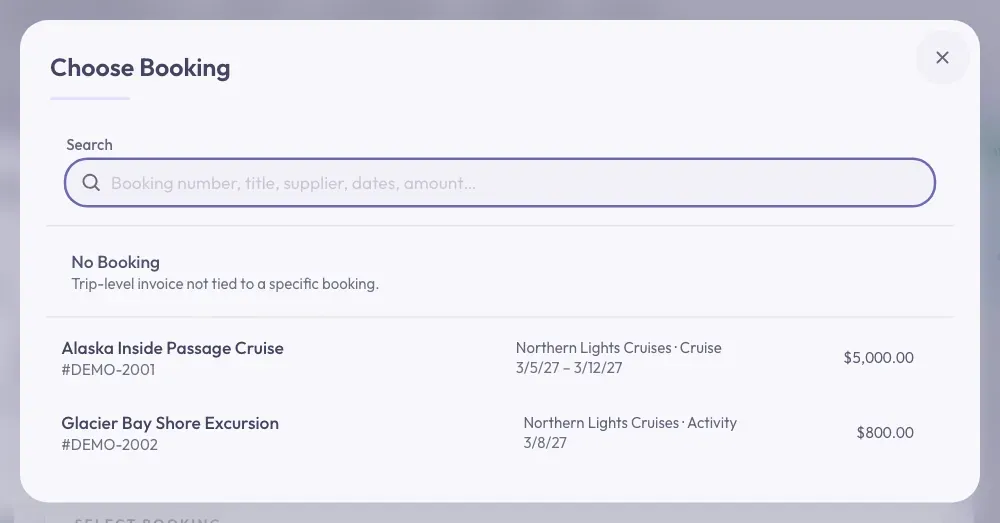
On the Booking step, click the Booking box. A list of the trip's bookings opens.
-
Click the booking this invoice is for. If it is not for one booking, click No Booking at the top of the list.
-
You may see a message that says the booking already has a draft invoice. If so, click Finish Payment Setup to replace the draft. Click Add Another Invoice to keep the draft and add a second invoice.
-
Click Continue at the bottom right of the window.
-
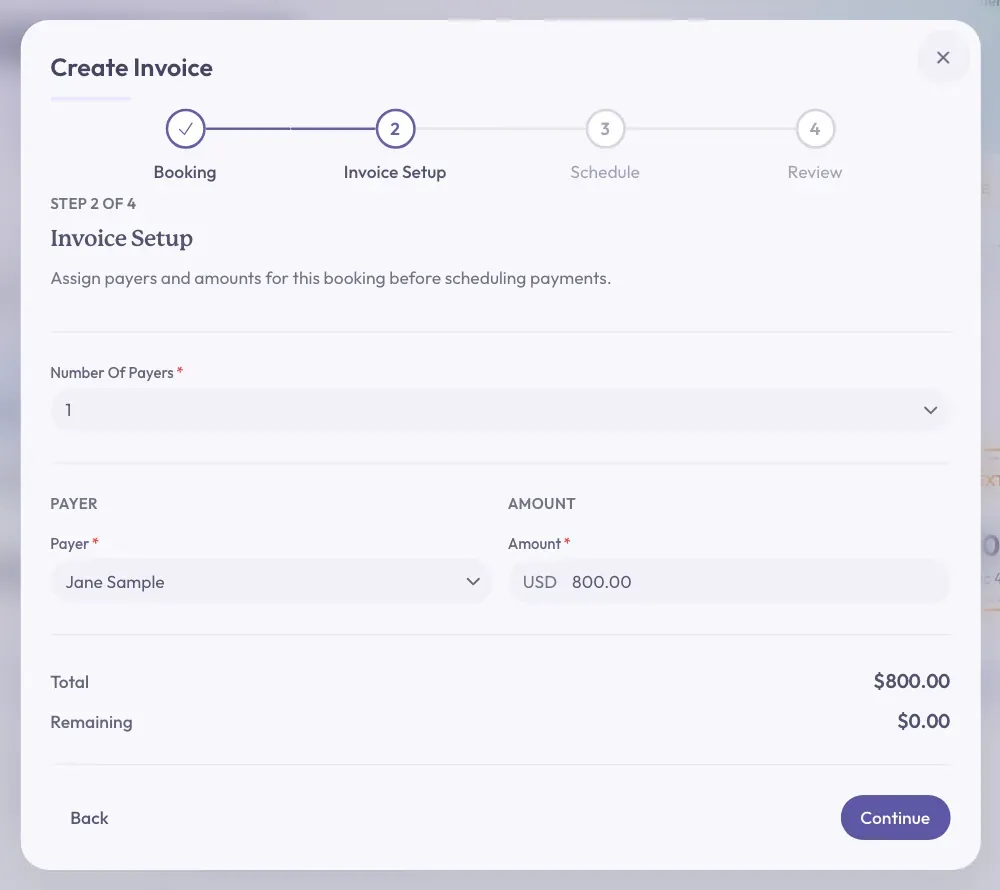
On the Invoice Setup step, click Number Of Payers and choose how many people will pay.
-
Click each Payer box and choose the person.
-
In each Amount box, check or type how much that person owes.
-
Click Continue.
-
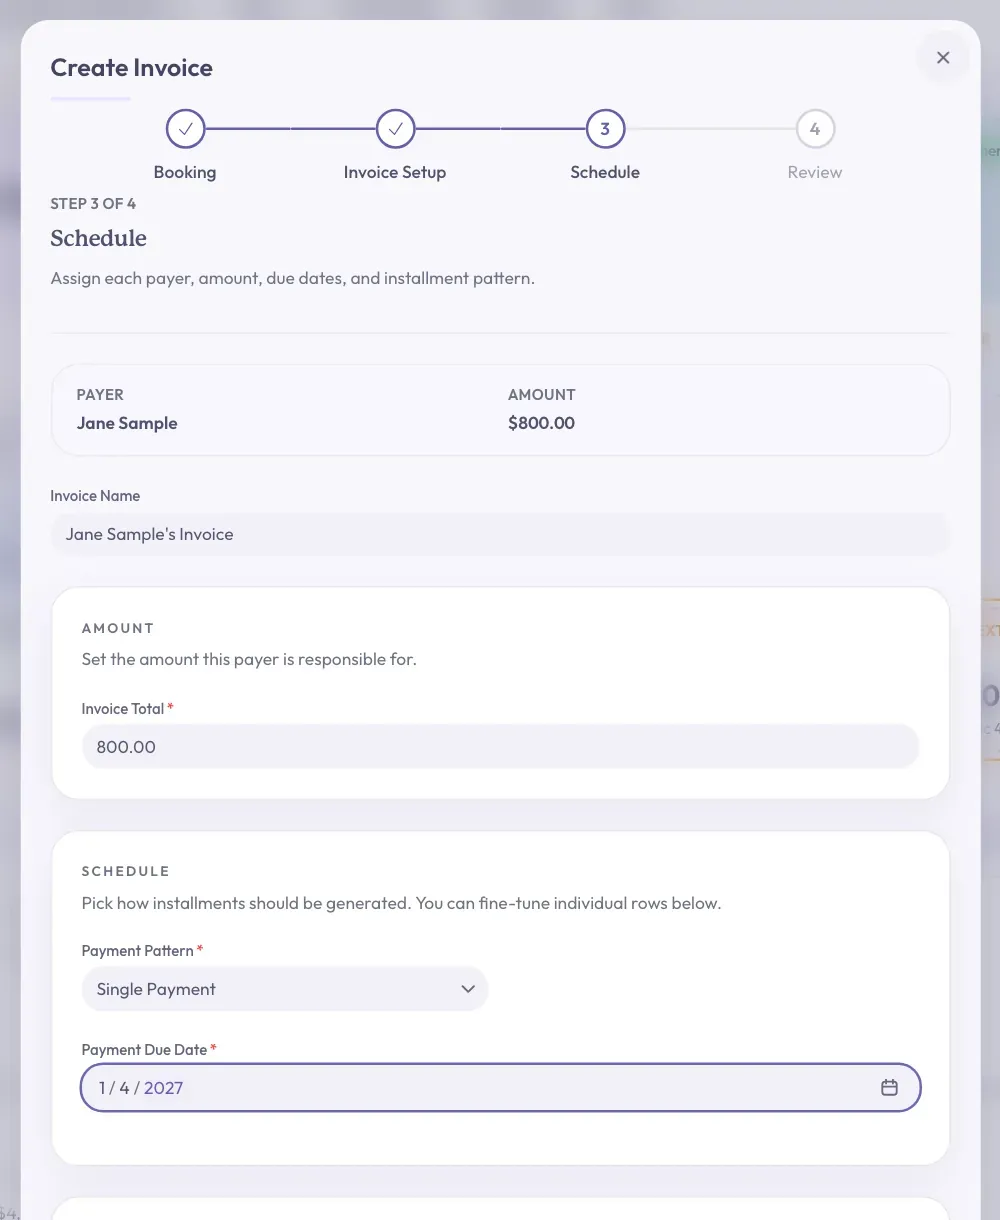
On the Schedule step, click Payment Pattern and choose one. To keep it simple, choose Single Payment.
-
Click the Payment Due Date box and pick a date.
-
Click Continue. If you have more than one payer, this button says Continue To Next Payer until the last one.
-
On the Review step, check the names, dates, and amounts. To fix something, click Back at the bottom left.
-
Click Save Payment Plan at the bottom right.
You will see the message Invoices created. Your new invoice is now on the Financials tab, with each payment in its own box.
Stuck? If you see No Travelers, nobody is linked to this booking or trip yet. Link a traveler first, then try again.
Stuck? If you see Payer amounts must add up to the remaining booking total, the amounts are not right yet. Fix them until the Remaining line under the boxes shows zero.
Let Your Traveler See It
Your traveler can see their payments on the shared trip page. You send them the link and password yourself. Follow the steps in Share A Trip Page With Your Traveler.
Your traveler opens the link, types the password, and clicks the Payments tab. They only see confirmed bookings, not drafts.
Remove An Invoice
-
On the invoice, click the button with three dots.
-
Click Remove Plan.
-
In the window that opens, click Remove Invoice. This cannot be undone.
Good to know: If a payment has been recorded on an invoice, Remove Plan does not appear.
What To Do Next
When your traveler pays, read Record A Payment From A Traveler.