
A traveler is a person you help, such as a client. Once you create a traveler, you can keep their details, notes, and trips in one place. You only need their first and last name to start.
Good to know: You'll only see Travelers if your plan includes it. It is not part of the free plan. Read Change Your Plan.
Create A Traveler Step By Step
-
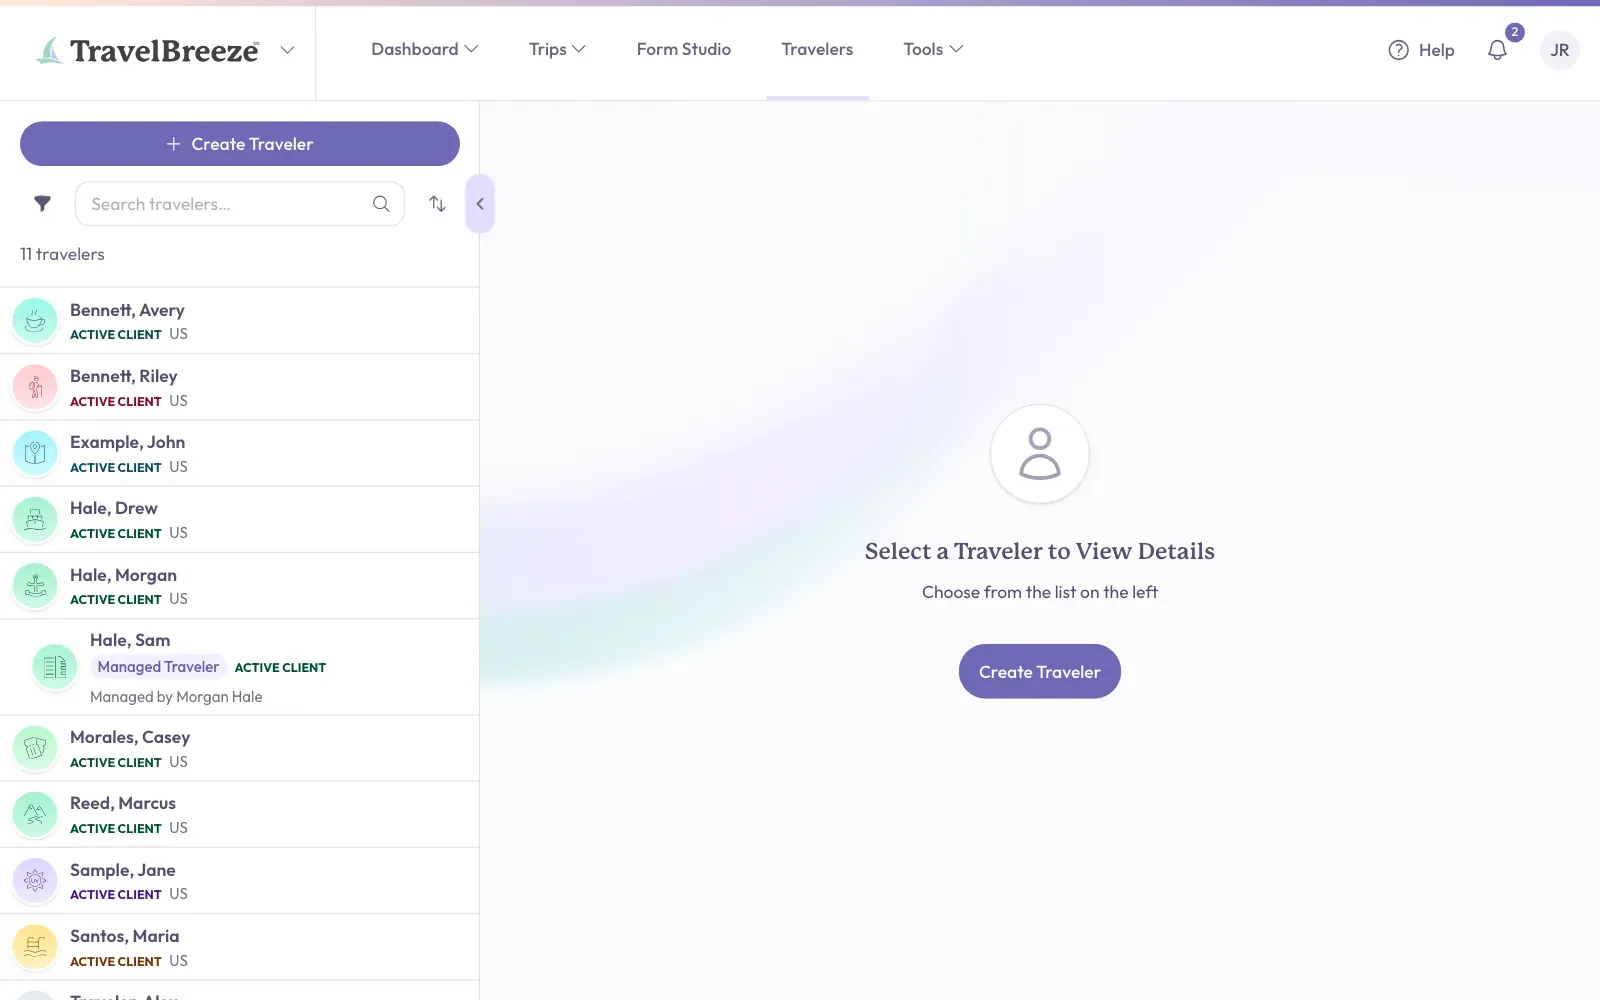
Click Travelers in the main menu at the top of the page.
-
Look at the top of the list on the left side of the page. Click the Create Traveler button.
-
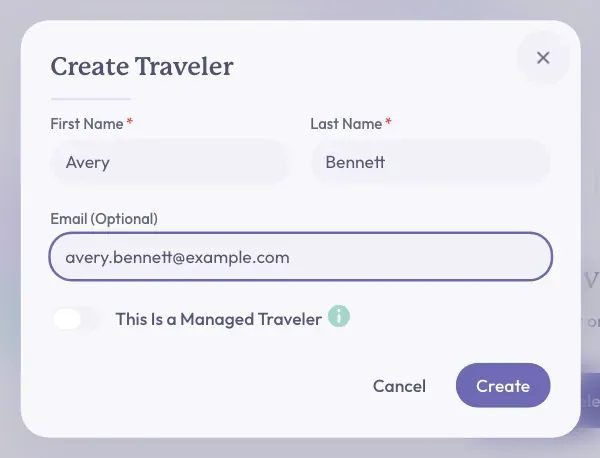
A small window opens. Click inside the First Name box and type their first name.
-
Click inside the Last Name box and type their last name.
-
If you have their email address, type it in the Email (Optional) box. If not, leave it empty.
-
Click the Create button at the bottom right of the window.
What You Should See Next
A short message says the traveler was created. Their page opens, with their name at the top and the Info tab showing.
They now appear in your traveler list. Every new traveler starts with the status Prospect, which means a possible client.
Next, you can fill in the rest of their details, or keep notes about them.
Good to know: A new traveler belongs to you. Other advisors usually will not see them in their own list. Agency owners, admins, and staff can see everyone.
If Something Goes Wrong
- A red message under a box. A name is missing, or the email address has a typing mistake. Fix the box and click Create again.
- A message says the email is already in use. Someone in your agency already has that email address. Search for them first, so you do not create the same person twice. Read Find And Update A Traveler.
Stuck? Creating a child or someone who shares a family member's email? Read Create A Family Member Or Someone You Manage.